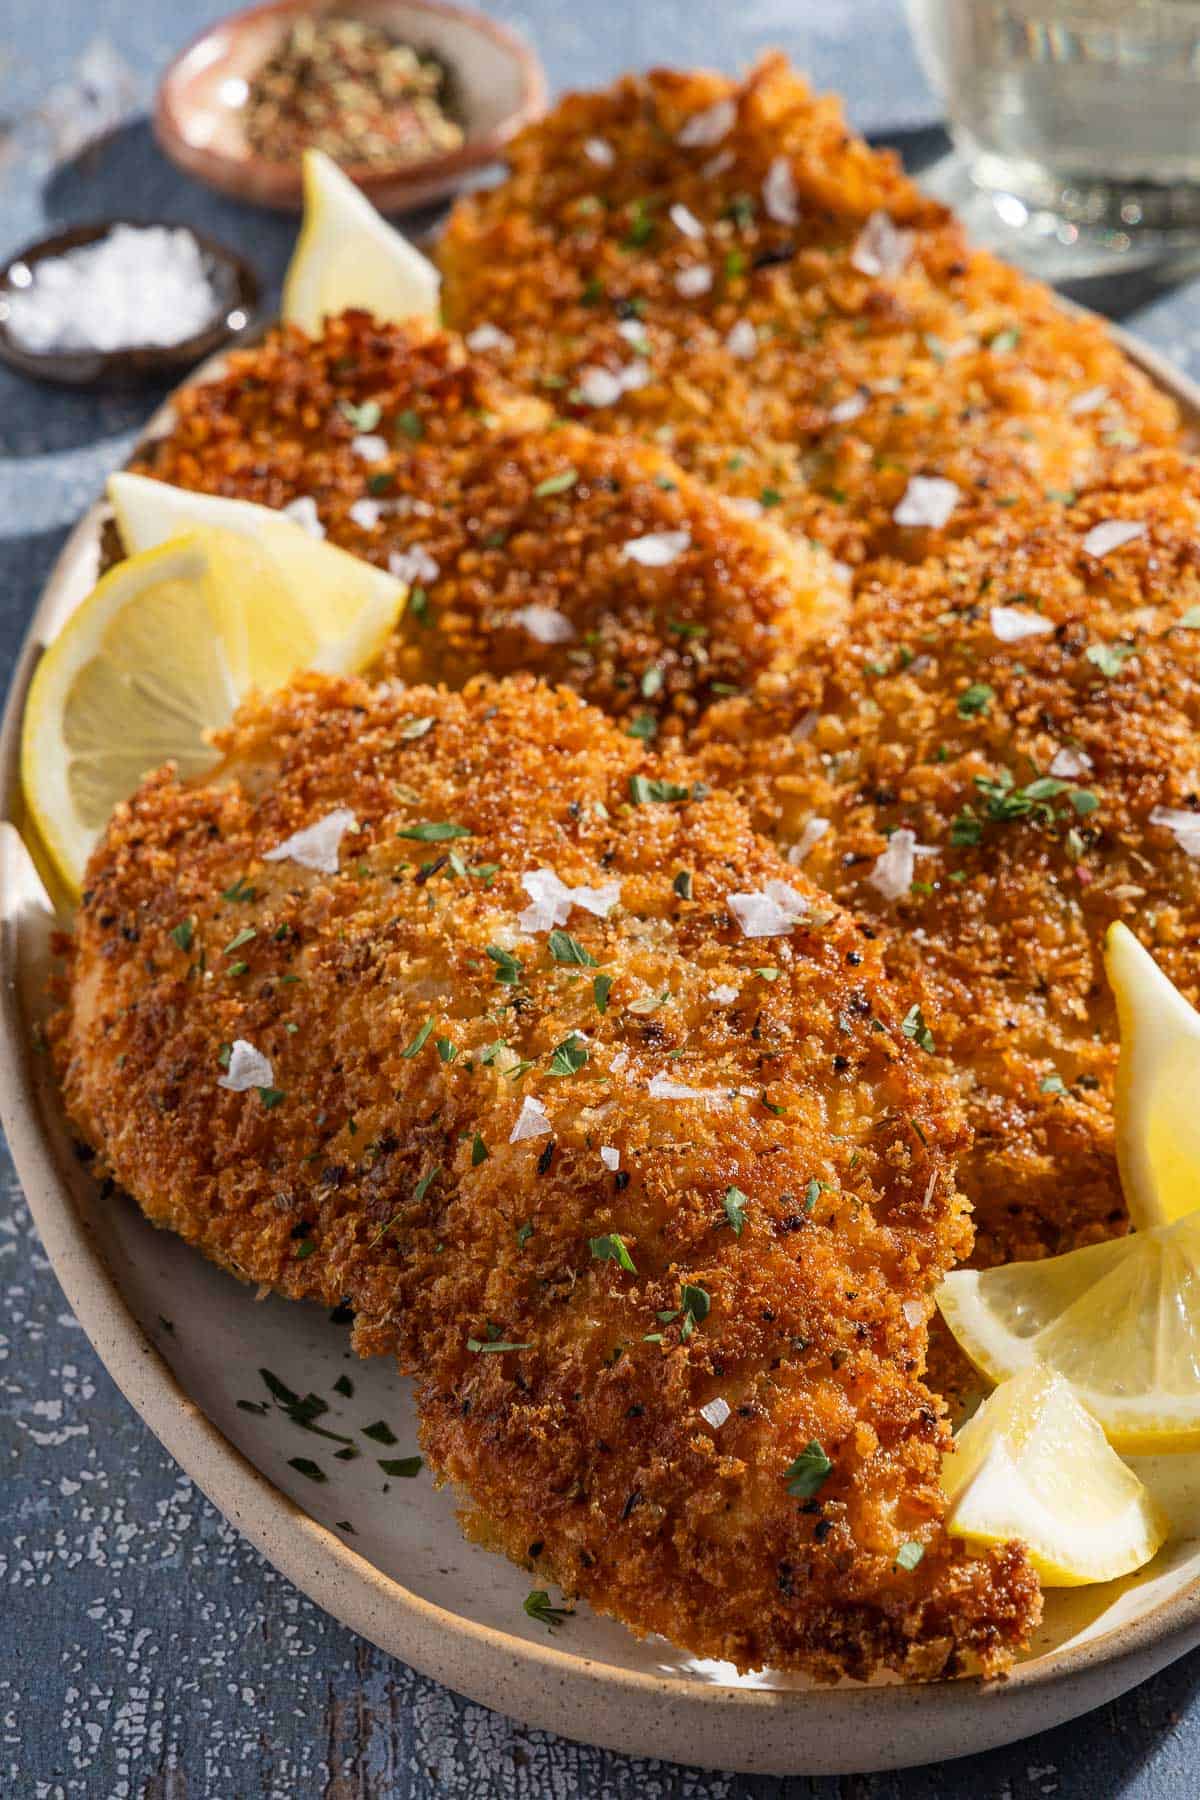
Crispy, satisfying and ready in 30 minutes, these easy breaded chicken cutlets are your answer to quick and delicious weeknight dinners.

There’s nothing I love more than spending all afternoon cooking an elaborate meal or babysitting a simmering pot on the stove–from making homemade vegetable broth to individually stuffing Italian cookies. But most days, I’m rummaging through my kitchen with a half hour before dinner and no plan in sight.
Enter this breaded chicken cutlets recipe, with a crispy-cheesy parmesan breadcrumb coating, the juiciest chicken breasts, and no planning necessary. It’s a quick and easy recipe to have in your toolbox, using ingredients you likely already have!
I keep these breaded chicken cutlets on a regular rotation to help with busy weeknights. However, I also get bored if I eat the same meal too often. Chicken cutlets aren’t just easy to adapt to your schedule, they’re also adaptable to whatever you’re craving that day.
Keep it simple and use them to make leftovers more enticing, or serve them with a lemony side salad. For a larger meal, serve on top of pasta or in a sandwich.
Table of Contents
- What is a Chicken Cutlet?
- Ingredients for Chicken Cutlets
- How to Make Chicken Cutlets
- How to Make Cutlets from Chicken Breasts
- Optional: Upgrade with a Marinade!
- How to Store Breaded Chicken Cutlets So They Stay Crispy
- What to Serve with Breaded Chicken Cutlets
- More Chicken Cutlet Recipes
- More Chicken Cutlets Recipes
- Crispiest Breaded Chicken Cutlets Recipe
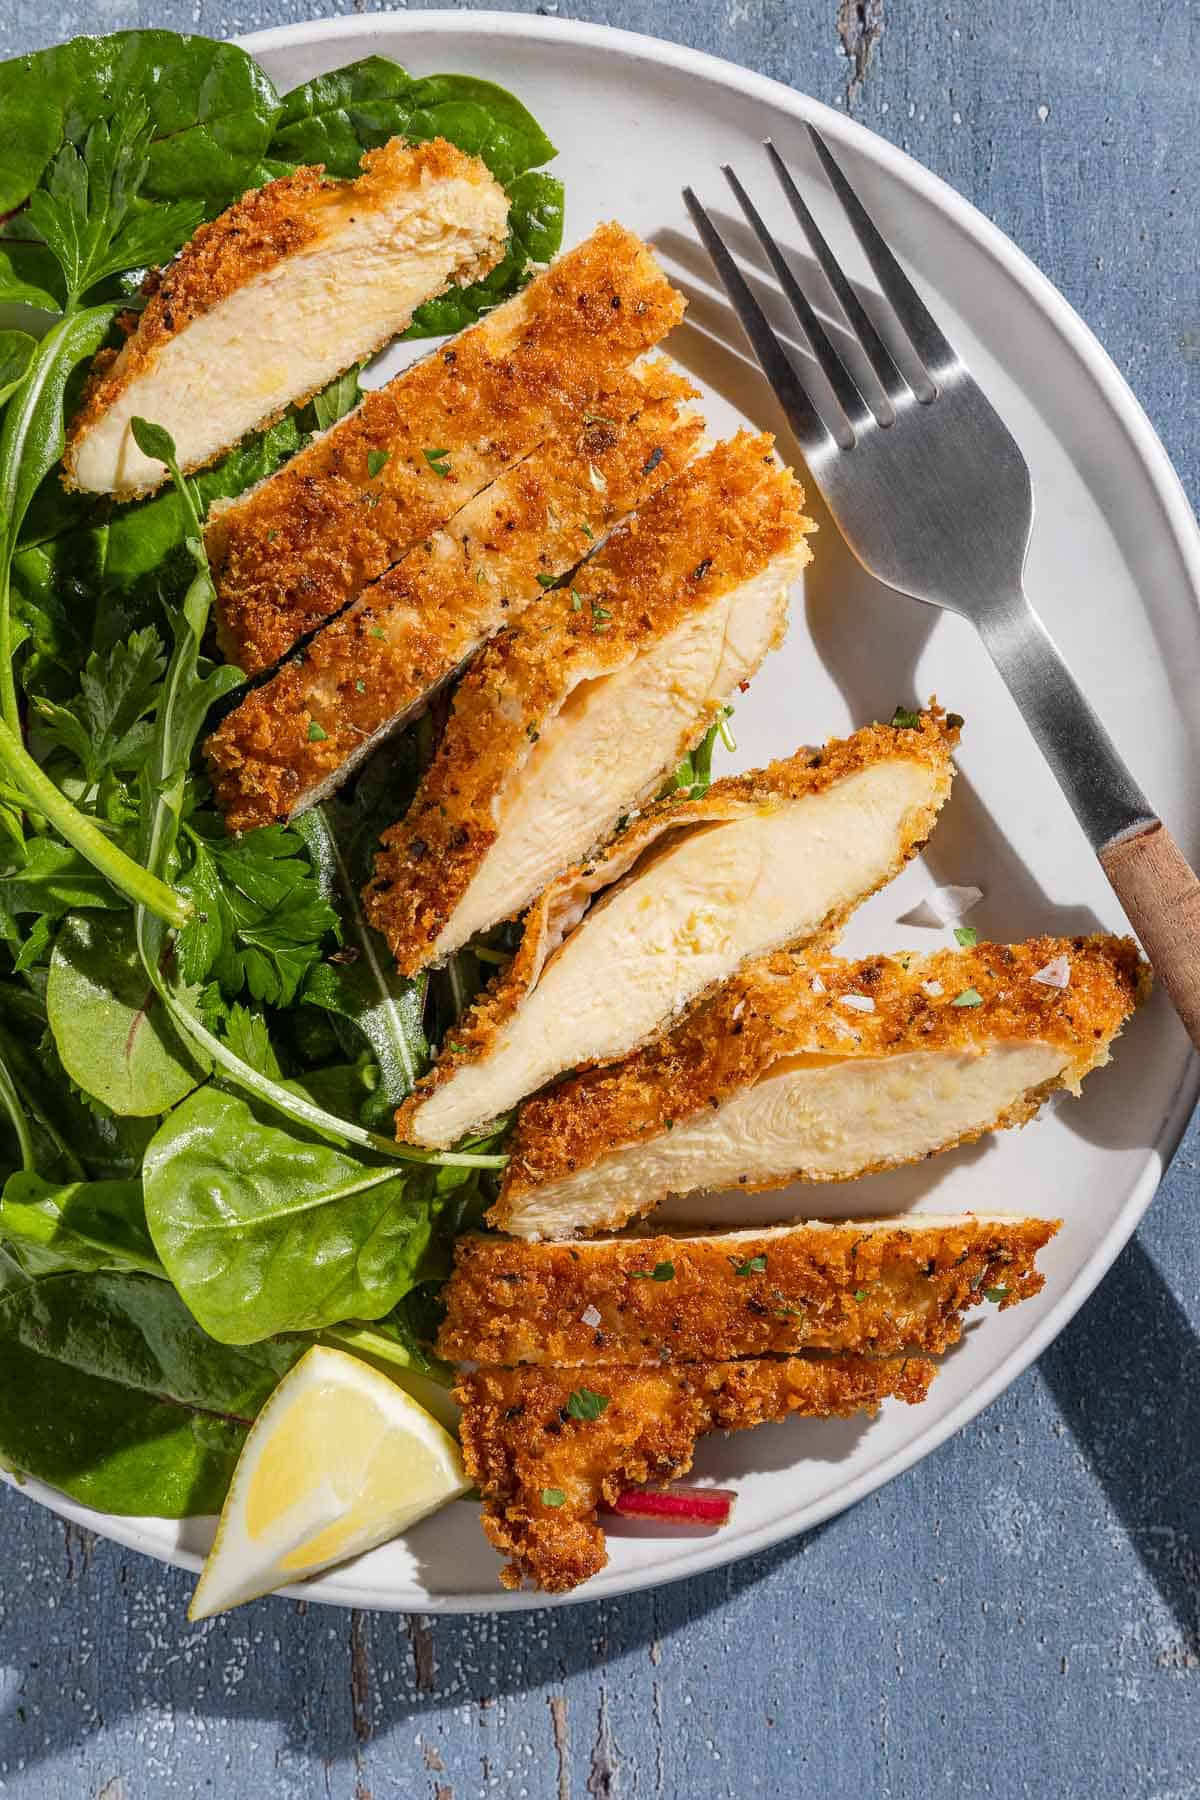
What is a Chicken Cutlet?
A chicken cutlet is simply a boneless skinless chicken breast that has been cut in half horizontally. Sometimes they’re pounded with a meat pounder to make them thinner and more even.
Chicken breasts usually take about 15 minutes to cook through on the stove. They have a thick end and a thin end, so by the time the thicker end is cooked through, the thinner end is overcooked and dry.
Chicken cutlets are thinner, with a more even thickness from end to end. They cook faster and more evenly than chicken breasts, making them more tender and perfect for weeknights.
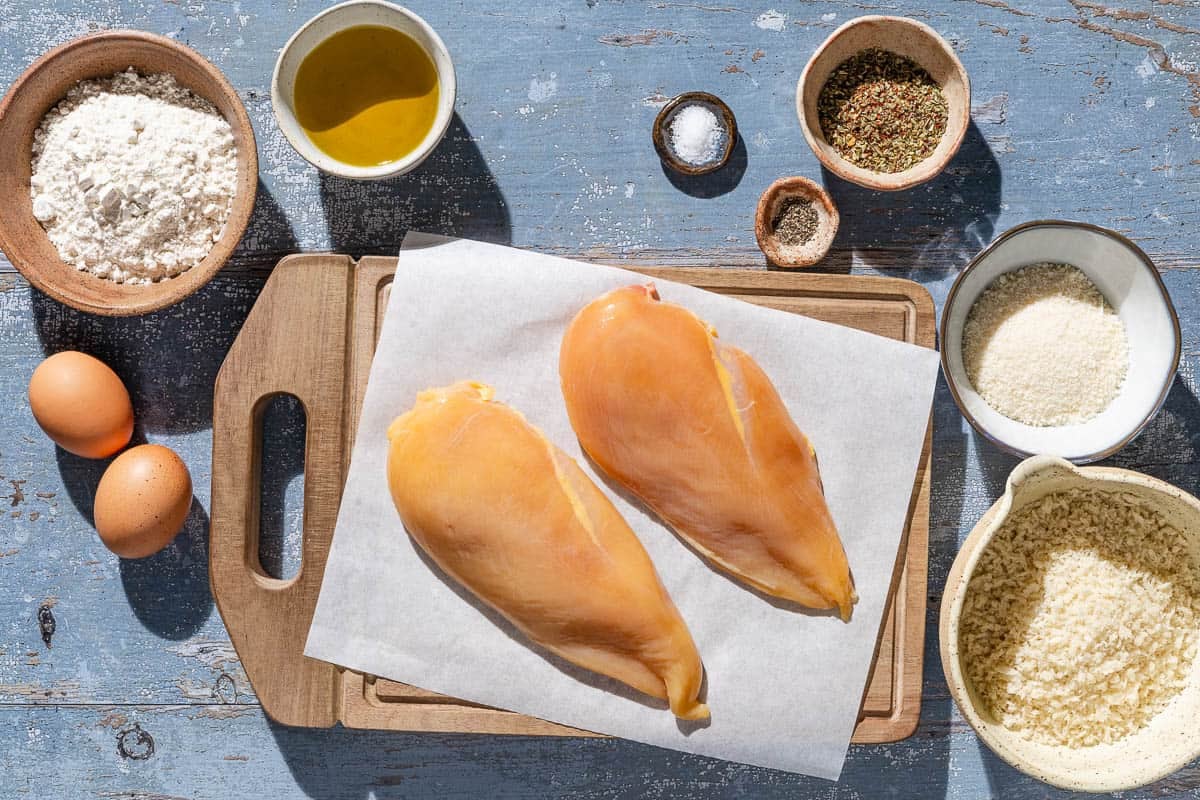
Ingredients for Chicken Cutlets
After a long day, the last thing I want to do is run to the store. And I never have to when I want to make chicken cutlets. I always have the ingredients on hand.
- Chicken cutlets or boneless skinless chicken breasts: Chicken cutlets cook faster than chicken breasts, making them ideal for a weeknight meal. They cook more evenly too, so they’re less likely to dry out. You can easily make cutlets from boneless skinless chicken breasts (see tips below).
- Salt and pepper: I season the chicken cutlets directly with kosher salt and black pepper to ensure they’re properly seasoned. I also like to sprinkle on some flaky sea salt for added crunch and visual appeal.
- Breadcrumbs: Panko breadcrumbs give the crispiest breading, but you can use plain breadcrumbs or even homemade if you have some.
- Parmesan cheese: Freshly grated parmesan cheese is nutty and toasts nicely. It gives the cutlets a beautiful golden crust.
- Italian seasoning: I like to use this Homemade Italian Seasoning, an aromatic blend of dried herbs like rosemary, basil, and oregano. Make your blend in a big batch and keep it in a jar. Or you can use a quality store-bought version.
- Eggs: Allow the breadcrumb mixture to stick to the cutlets.
- All-purpose flour: Helps to absorb extra liquid to make the breading extra crispy.
- Extra virgin olive oil: I like to pan-fry chicken cutlets with extra virgin olive oil–see more about cooking with olive oil in our guide: Cooking With Olive Oil: Everything You Need To Know! And find our favorite extra virgin olive oils from across the Mediterranean and beyond at our shop.
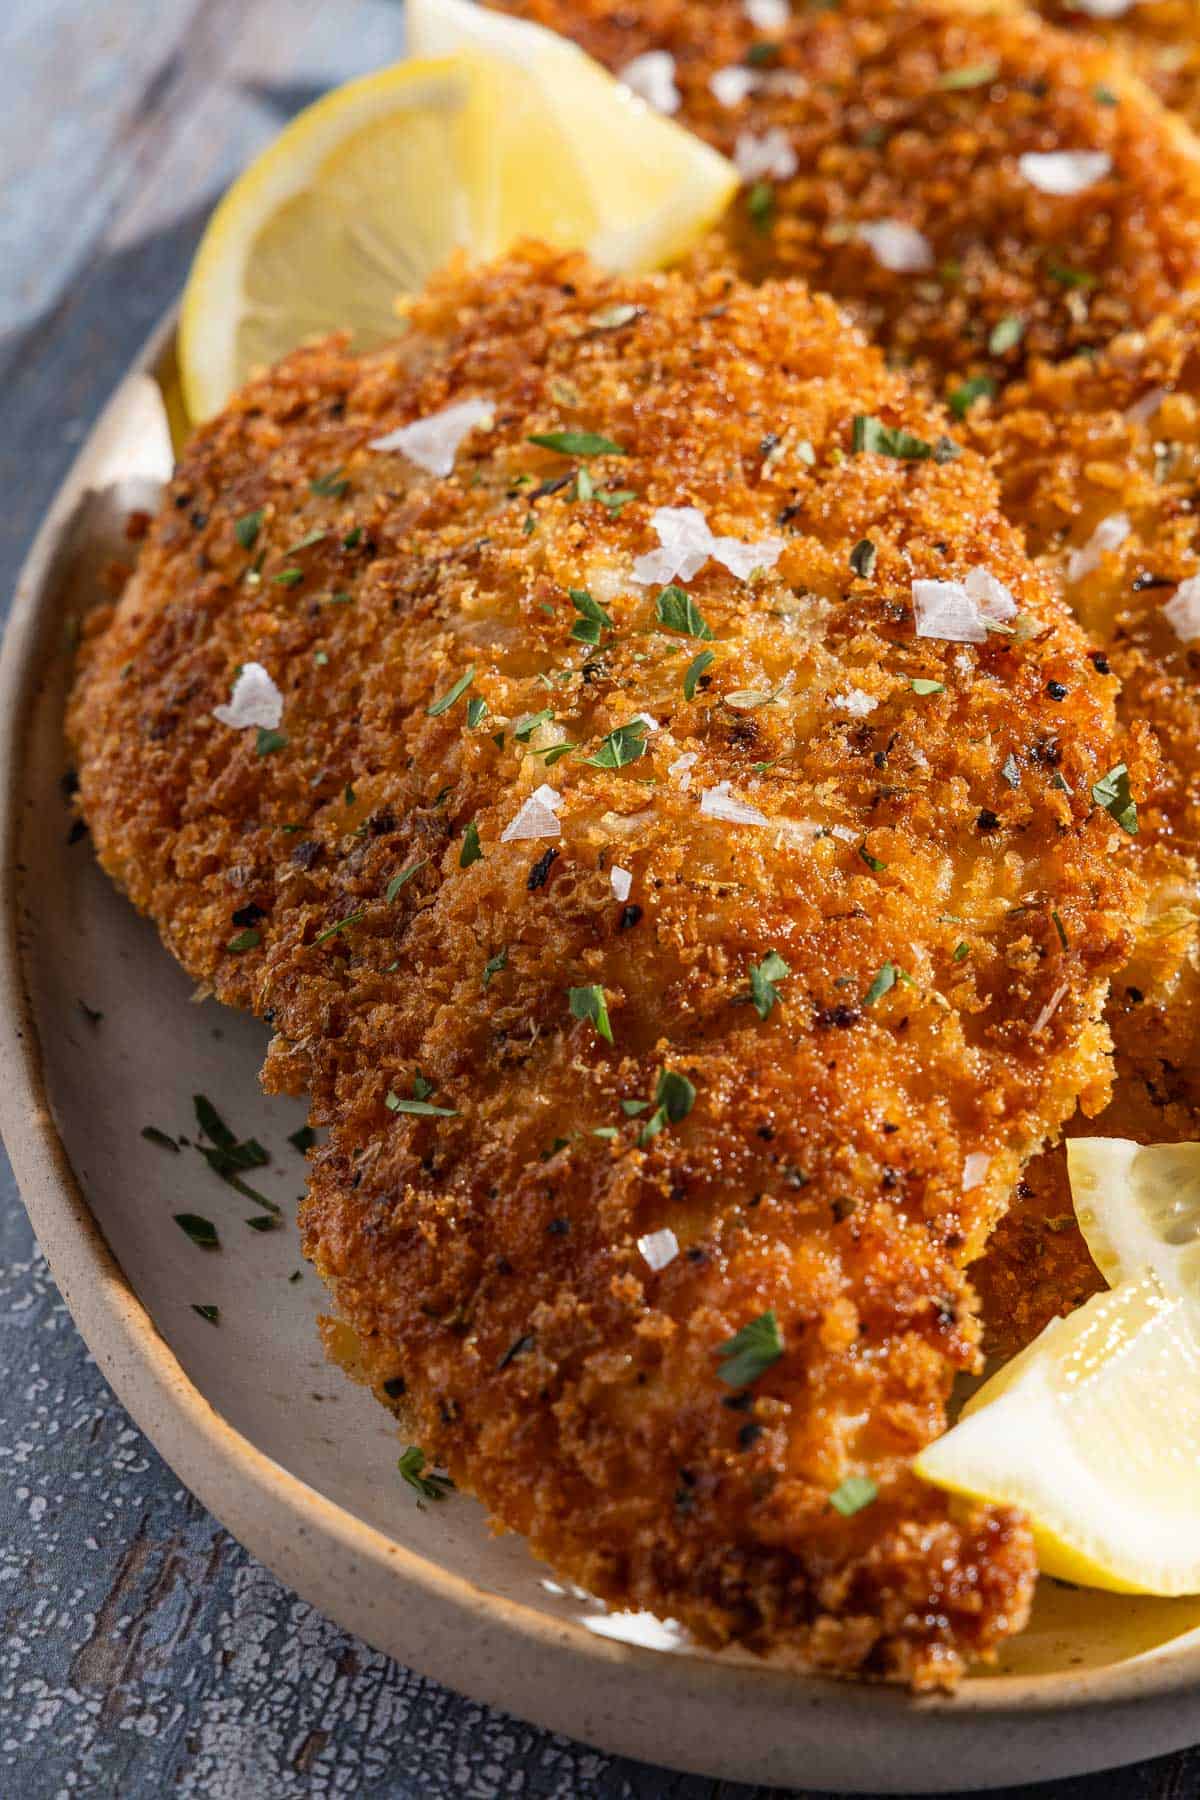
How to Make Chicken Cutlets
I can usually have the first batch of two cutlets on the table in 30 minutes, and cooking the second batch only takes a few minutes more. A dredging station sounds complicated, but it makes breading the chicken into a quick assembly line.
Get Ready
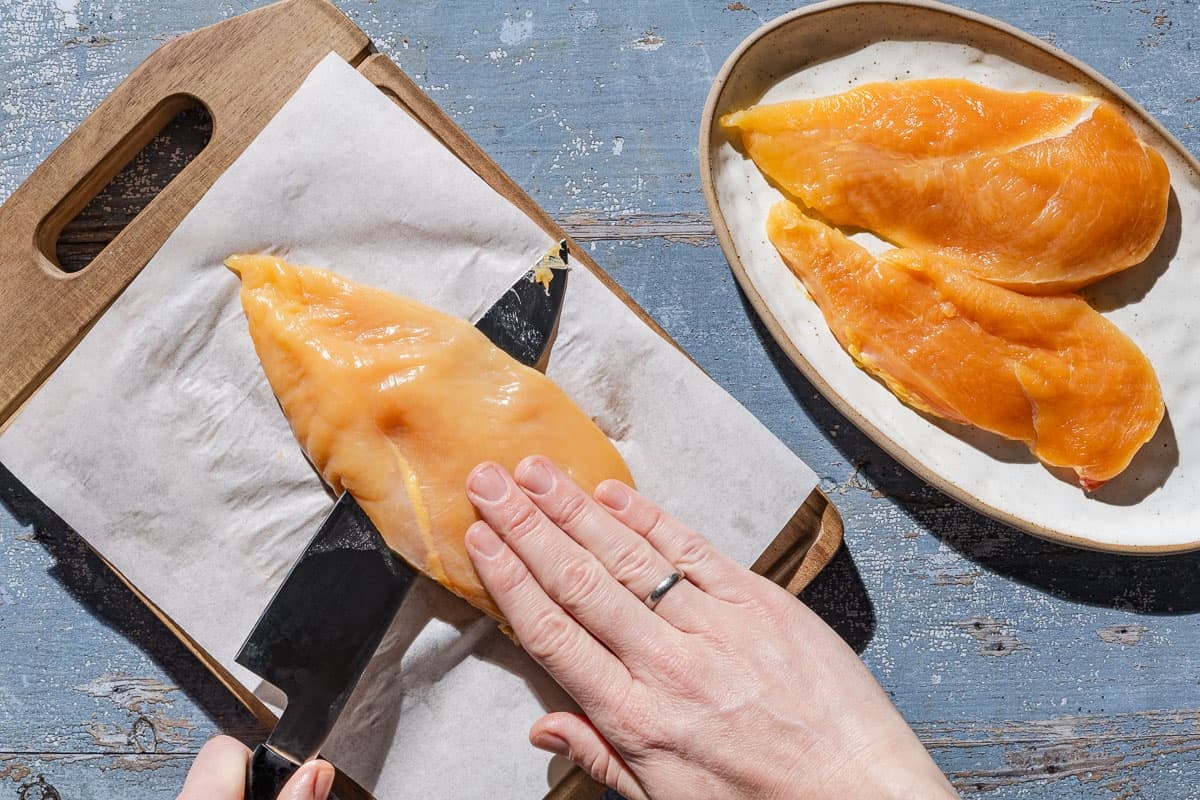
- Make the chicken cutlets: If you’re starting from 2 boneless skinless chicken breasts, slice the chicken breasts in half horizontally with a sharp knife. Use the palm of your hand to hold the chicken flat and in place while slicing smoothly with the other hand in as few strokes as possible (more tips below).
- Season the chicken: Generously season both sides of the chicken cutlets with salt and black pepper.
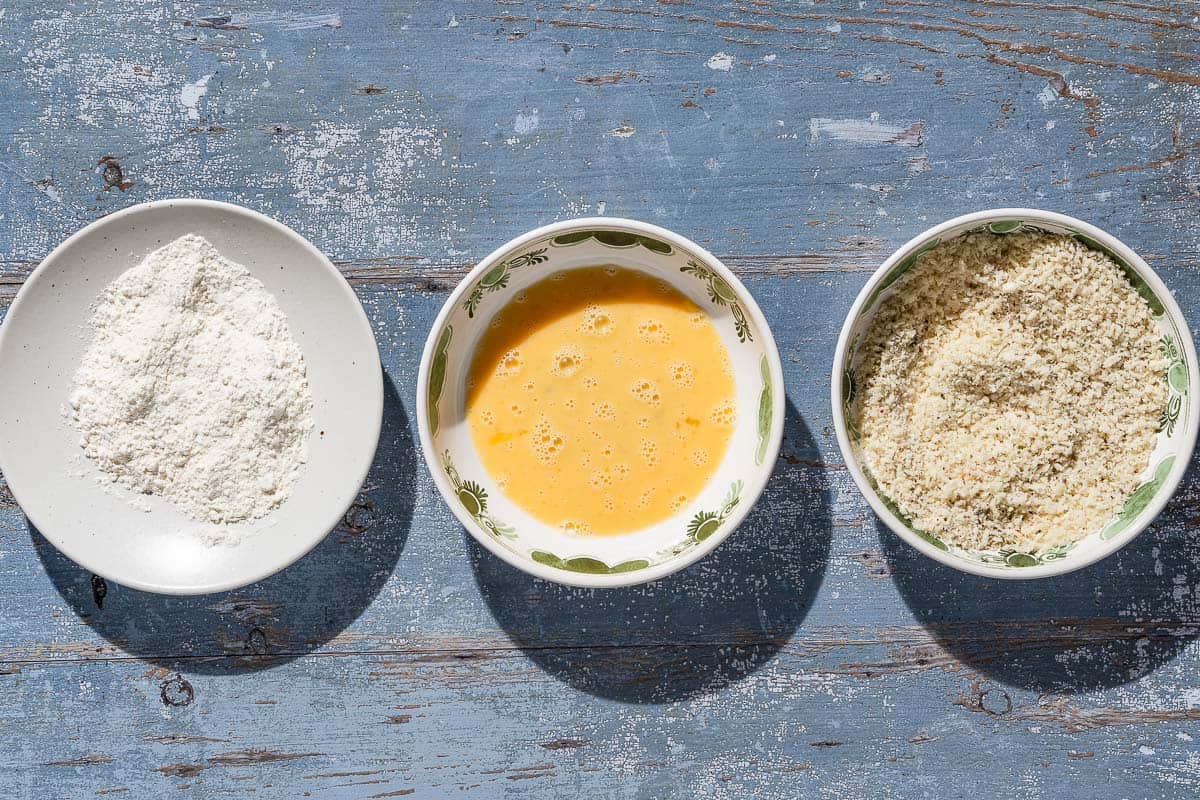
- Prepare a dredging station: Set up the chicken next to three large deep plates or shallow bowls. I like to work in order from left to right: spread add 1/2 cup all-purpose flour in the first bowl. Beat 2 eggs in the second bowl. Finally, stir together 1 cup breadcrumbs, 1/2 cup grated parmesan, and 2 teaspoons Italian seasoning in the third. Set up an empty plate or tray for the breaded cutlets on the right.
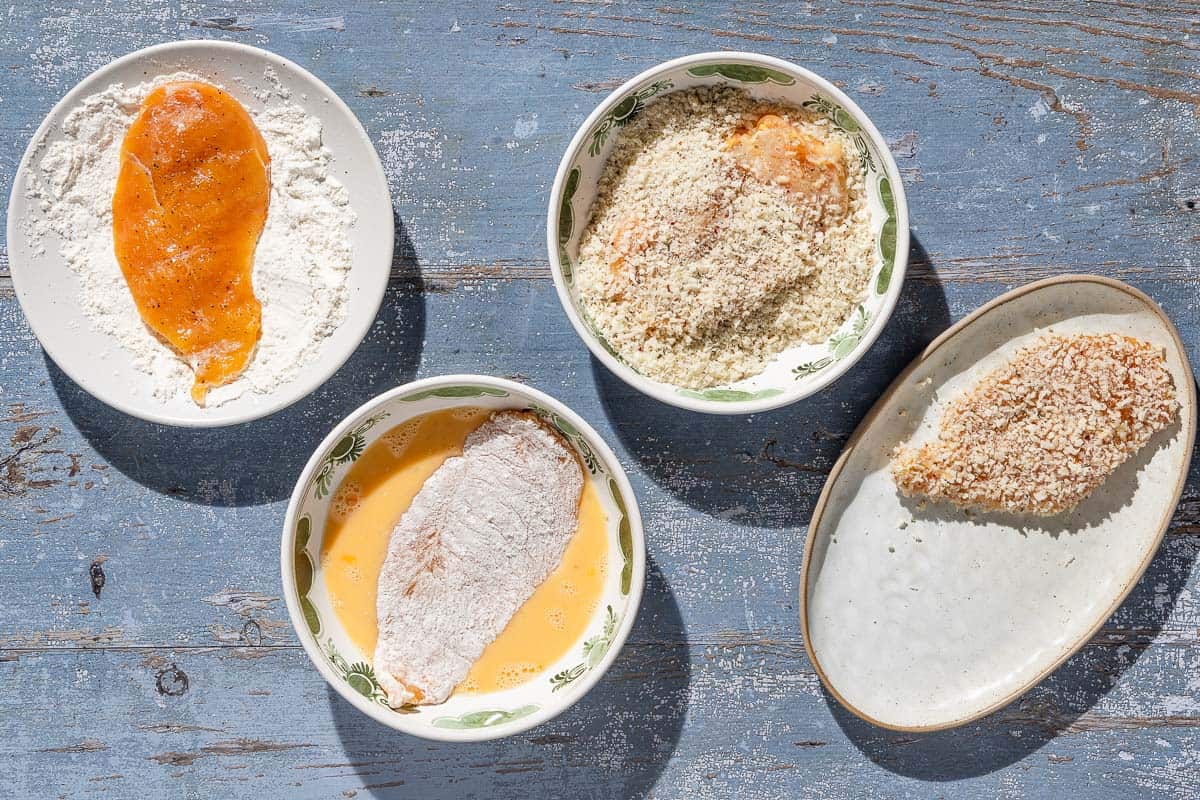
- Bread the chicken cutlets: Working one at a time, place a chicken cutlet in the bowl of flour and coat both sides, shaking off the excess. Then transfer the cutlet to the bowl of beaten eggs and coat both sides, letting the excess runoff. Set the cutlet in the breadcrumbs and coat both sides, gently pressing the breadcrumbs onto the cutlet so they stick. Set the breaded cutlet aside on the reserved plate. Repeat with the remaining cutlets. Set the cutlets aside for 10 minutes or so to allow the breading to stick.
Pan-Fry the Cutlets
- Heat the oil: Set a wire rack over a sheet pan next to your stove. In a nonstick skillet over medium-high heat, add enough oil to cover your skillet (I used 1/4 cup). Heat until it’s shimmering but not smoking. You can test if the oil is ready by dropping in a few breadcrumbs. If they start sizzling gently, the oil is ready. If they sizzle loudly and brown very quickly, lower the heat slightly.
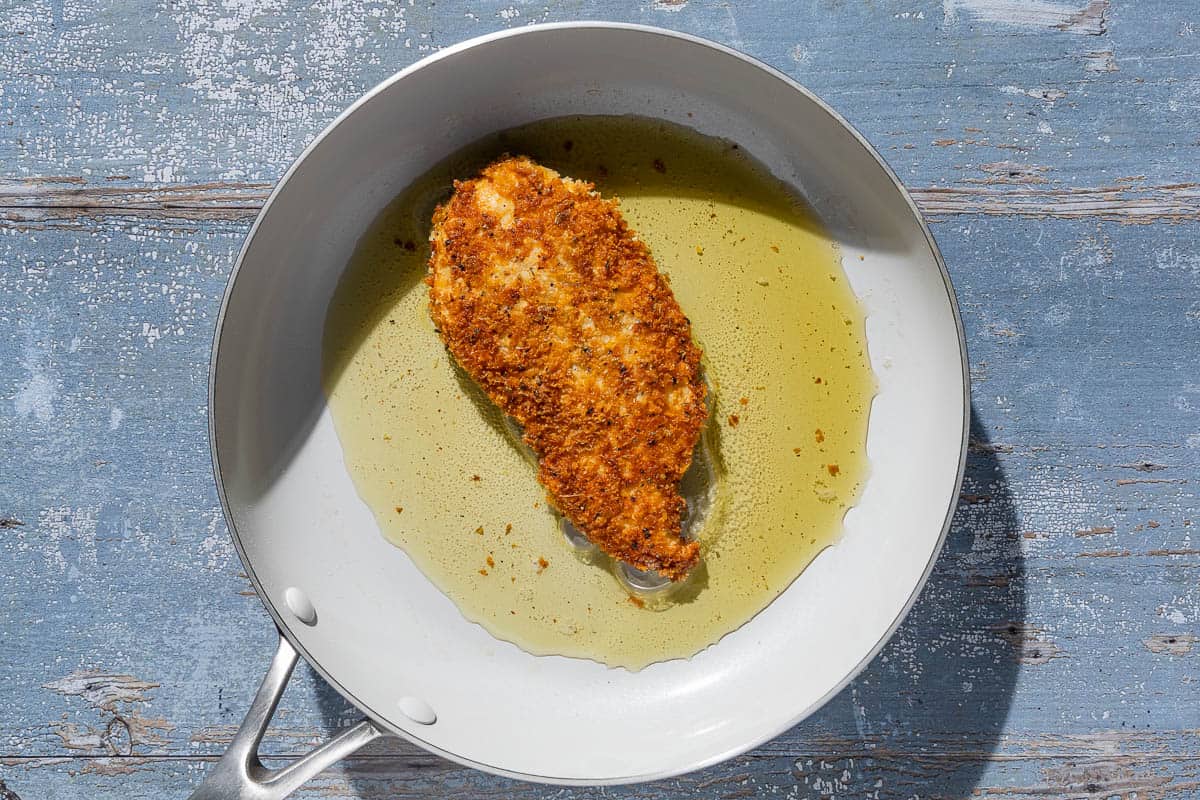
- Pan fry the cutlets: Cooking in batches to avoid crowding the pan, carefully add 1 or 2 cutlets into the pan. To avoid splattering the hot oil, use tongs to lay each cutlet down starting with one tip by the edge of the pan nearest you and carefully laying it away from you towards the furthest edge of the pan.
- Flip: Cook until golden brown on both sides, about 3 minutes per side. Transfer the cutlets to the wire rack to drain and repeat with the remaining cutlets, adding 1 to 2 tablespoons of olive oil as needed between batches.
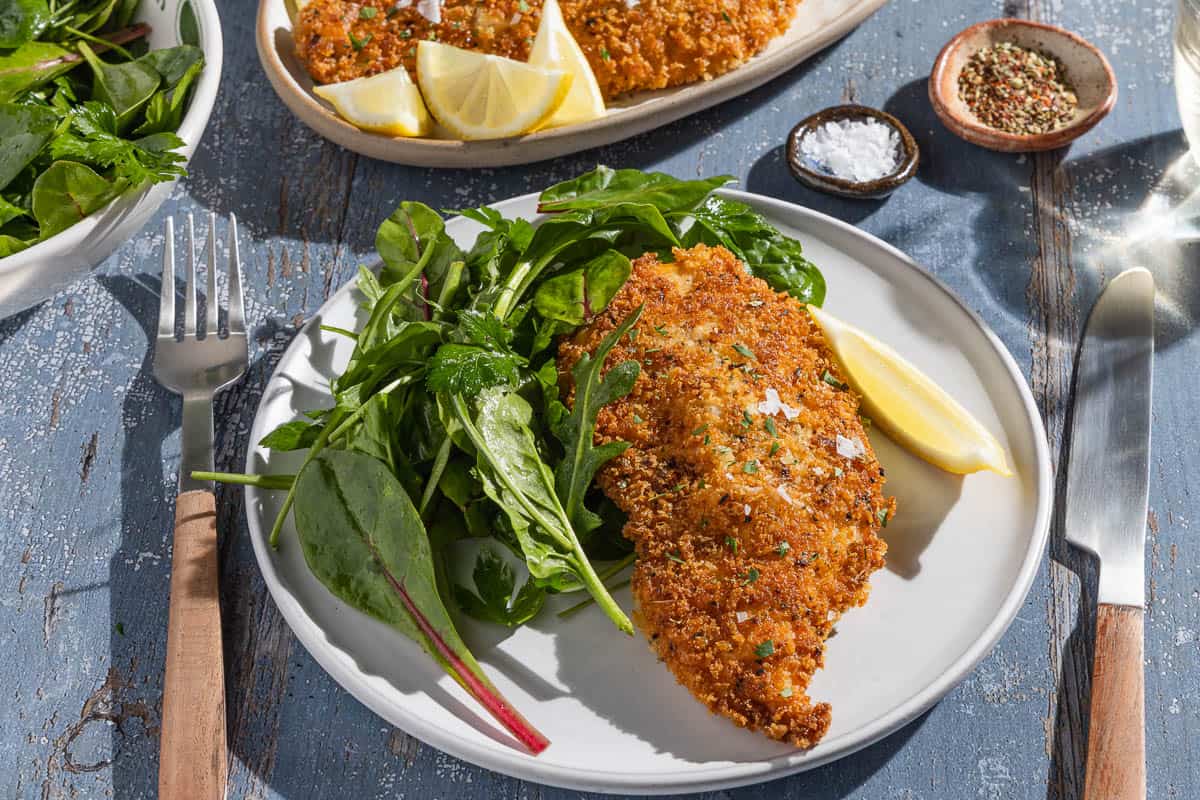
- Serve: Sprinkle on flaky sea salt to finish (if using.) Serve with lemon wedges to squeeze over the cutlets.
How to Make Cutlets from Chicken Breasts
You can buy chicken cutlets already prepared, but it’s cheaper and relatively easy to make your own starting with boneless skinless chicken breasts. To cut chicken breasts into cutlets:
- Slice: Set the chicken breast on a cutting board. Hold it flat with the palm of your hand. Use a long, sharp, non-serrated knife like a chef’s knife or a boning knife. Slice the chicken in half horizontally, as smoothly as you can, and in as few slices as possible, starting at the thickest side.
- Pound: I usually skip this step if I slice relatively even cutlets. If they’re not as even as you’d like, you can use a meat pounder. Layer the cutlet between two sheets of wax paper. Gently use the smooth side of a meat pounder to shape the cutlet. The goal is to achieve even 1/2-inch thickness, not to thin it out like schnitzel. If you go too far and end up with schnitzels, you have everything you need for this Crispy Chicken Schnitzel Recipe.
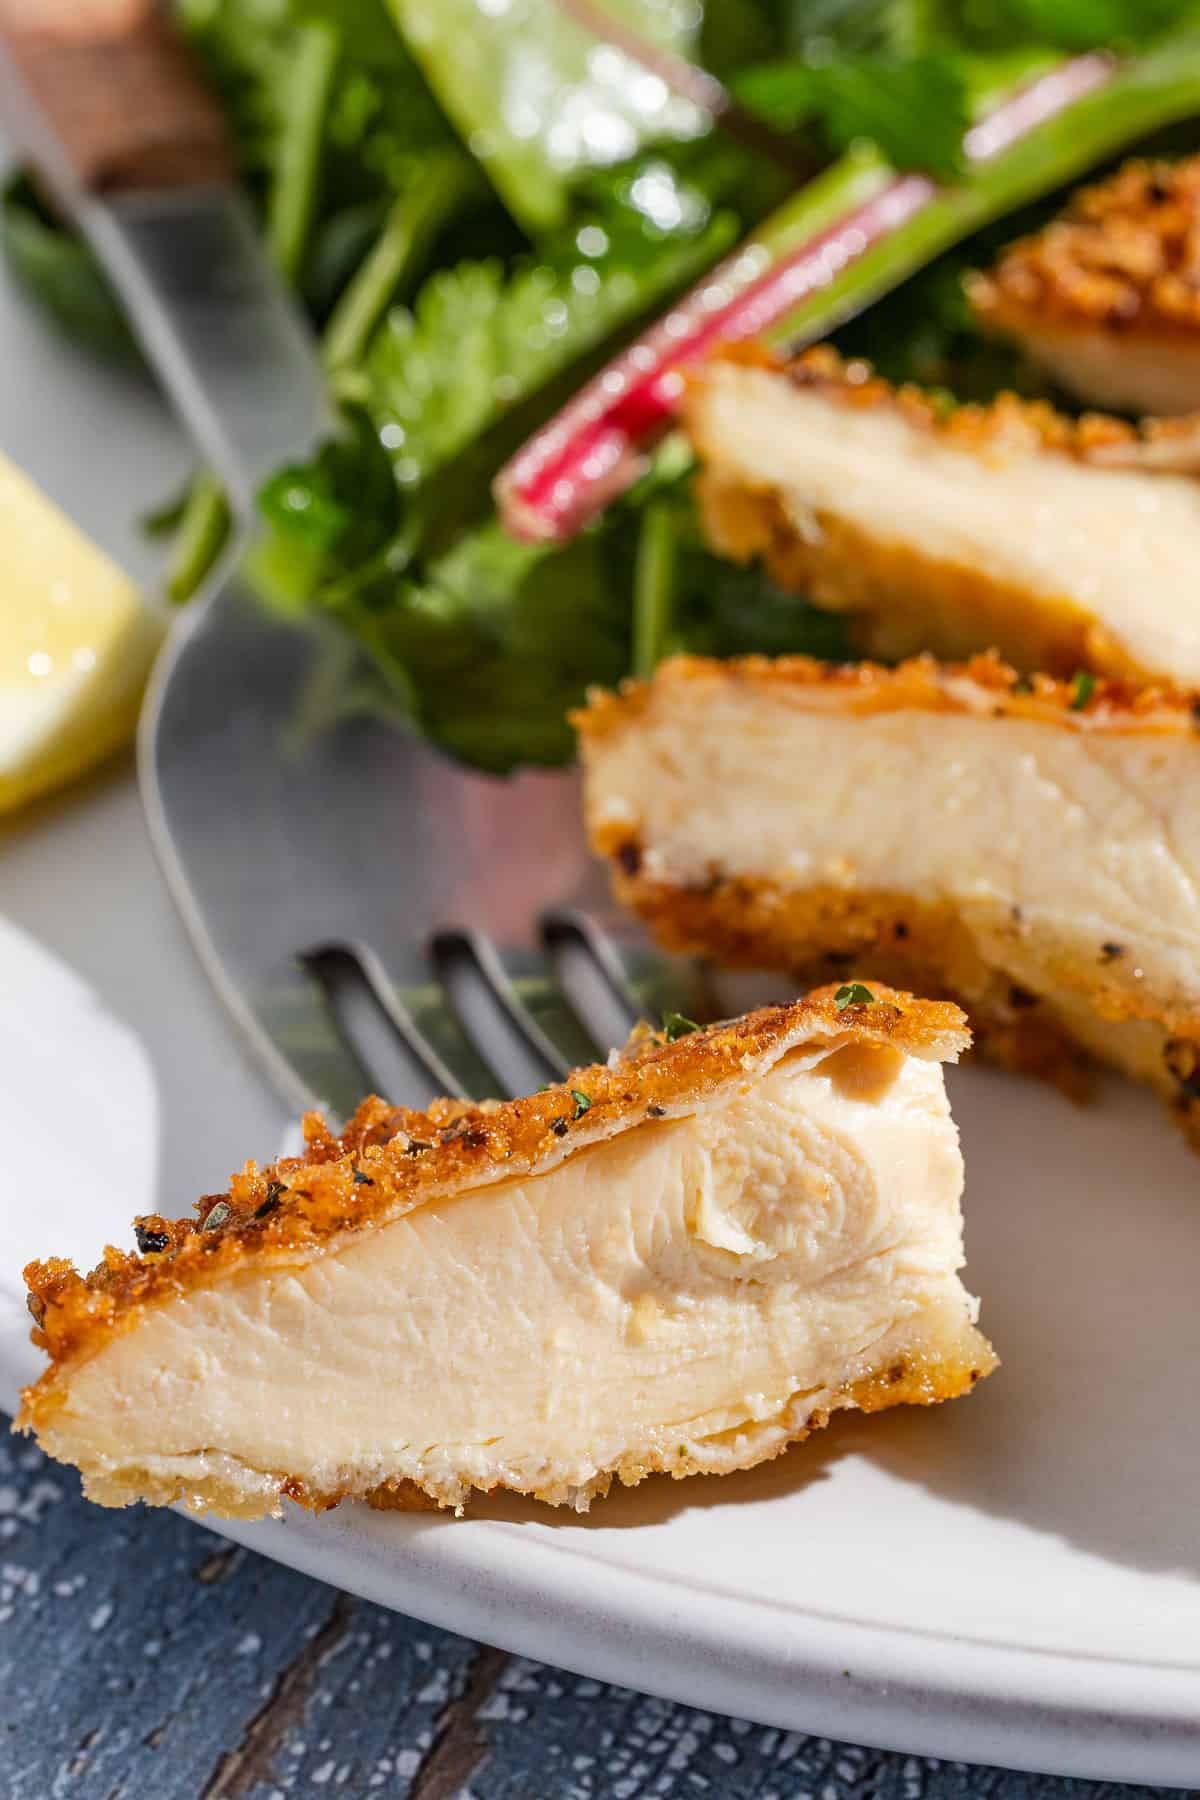
Optional: Upgrade with a Marinade!
Chicken naturally has a lot of savory, comforting flavor, so this recipe is delicious all on its own. But if I have extra time, I like to marinate the chicken cutlets to make them extra flavorful and juicy. Even a quick 15 minutes is enough to tenderize and infuse the chicken with flavor. To marinate:
- In a mixing bowl, whisk together the juice and zest from 1 lemon, a minced garlic clove, 1/2 teaspoon Italian seasoning, 1/2 teaspoon kosher salt, and 1/4 teaspoon black pepper.
- Add the chicken cutlets and toss to coat.
- Cover and let it marinate for 15 to 30 minutes.
How to Store Breaded Chicken Cutlets So They Stay Crispy
Store leftover chicken cutlets in an airtight container in the fridge for up to 4 days. To maintain the crispiness of the breading, reheat in a 400°F oven for about 10 minutes, or until warmed through.
What to Serve with Breaded Chicken Cutlets
I love making breaded chicken cutlets for a weeknight meal. They are fast, easy, and versatile, making them seem like an entirely different meal each time I make them.
Of course, Potato Salad is classic, but for a light and simple lunch, I like them with a side salad with tangy Lemon Vinaigrette to balance the richness. You can slice the cutlets and add them directly to your favorite salad recipe, like this Lemon Parmesan Salad, or use them in this Chicken Caprese Salad.
Serve the cutlets with a sauce and a couple of sides. My favorite is smokey Spanish Romesco sauce, but you can also try them with Tahini Sauce or drizzle with Balsamic Glaze. Make a sandwich to use up leftover chicken cutlets. I love to use them in place of the seared chicken breast in this antipasto chicken sandwich.
More Chicken Cutlet Recipes
Browse All Mediterranean Recipes
Visit Our Shop
Bundle and Save!
Taste your way through the Mediterranean with our signature olive oil collection, including our famous Greek olive oils, Private Reserve and Early Harvest, plus our new Nocellara Italian olive oil and Hojiblanca Spanish olive oil.

Crispiest Breaded Chicken Cutlets

Ingredients
- 4 chicken cutlets or 2 boneless skinless chicken breasts (about 12 ounces)
- Kosher salt, plus flaky sea salt for serving (optional)
- Black pepper
- 1/2 cup all purpose flour
- 2 large eggs
- 1 cup unseasoned breadcrumbs (I like Panko)
- 1/2 cup grated Parmesan
- 2 teaspoons Italian seasoning
- Extra virgin olive oil, for frying (or substitute with high quality neutral oil like avocado oil or sunflower oil)
- Lemon wedges, for serving
Instructions
- Make the chicken cutlets: If you’re starting from 2 boneless skinless chicken breasts, slice the chicken breasts in half horizontally with a sharp knife. Use the palm of your hand to hold the chicken flat and in place while slicing smoothly with the other hand in as few strokes as possible.
- Season the chicken: Generously season both sides of the chicken cutlets with salt and black pepper.
- Prepare a dredging station: Set up the chicken next to three large deep plates or shallow bowls.I like to work in order from left to right: in the first bowl, add the flour. Beat the eggs in the second bowl. Finally, stir together the breadcrumbs, parmesan, and Italian seasoning in the third. Set up an empty plate or tray for the breaded cutlets on the right.
- Bread the chicken cutlets: Working one at a time, place a chicken cutlet in the bowl of flour and coat both sides, shaking off the excess. Then transfer the cutlet to the bowl of beaten eggs and coat both sides, letting the excess run off. Set the cutlet in the breadcrumbs and coat both sides, gently pressing the breadcrumbs onto the cutlet so they stick. Set the breaded cutlet aside on the reserved plate. Repeat with the remaining cutlets. Set the cutlets aside for 10 minutes or so to allow the breading to stick.
- Heat the oil: Set a wire rack over a sheet pan next to your stove. In a nonstick skillet over medium-high heat, add enough oil to cover your skillet (I used 1/4 cup). Heat until it’s shimmering but not smoking. You can test if the oil is ready by dropping in a few breadcrumbs. If they start sizzling gently, the oil is ready. If they sizzle loudly and brown very quickly, lower the heat slightly.
- Pan fry the cutlets: Cooking in batches to avoid crowding the pan, carefully add 1 or 2 cutlets into the pan. To avoid splattering the hot oil, use tongs to lay each cutlet down starting with one tip by the edge of the pan nearest you and carefully laying it away from you towards the furthest edge of the pan.
- Flip: Cook until golden brown on both sides, about 3 minutes per side. Transfer the cutlets to the wire rack to drain and repeat with the remaining cutlets, adding 1 to 2 tablespoons of olive oil as needed between batches.
- Serve: Sprinkle on flaky sea salt to finish (if using.) Serve with lemon wedges to squeeze over the cutlets.
Video
Notes
- The wire rack allows airflow, which not only allows them to drain the excess oil but also keeps the chicken from steaming and getting soggy as they cool. If you don’t have a wire rack, you can rig one with tongs set on their side or a line of metal forks with the tines face-down.
- Store leftover chicken cutlets in an airtight container in the fridge for up to 4 days. To maintain the crispiness of the breading, reheat in a 400°F oven for about 10 minutes, or until warmed through.
- Nutrition info does not include the extra virgin olive oil–about 80 calories per serving if you use 1/4 cup oil.
- Visit our shop to browse quality Mediterranean ingredients including olive oils, honey, jams, and spices.


Loved this chicken recipe and instructions! I used my sourdough breadcrumbs and fried in avocado oil. This is the best breaded chicken recipe I’ve tried so far. Thanks for sharing!
I love to hear that! Thanks for coming back to comment!
Very easy to make and everyone at home loved it! Definitely a favourite!
Had this for dinner tonight. Hubby loved the chicken. A+++
Thank you for your easy to follow recipe. Loved these made just as instructed.
Very easy to prepare and super tasty.
How would you make this in an air fryer? What temperature and how long?
Hi, Debbie. I’m sure you could, but it’s not something we’ve tested, so it’s hard to advise on time/temp. I would refer to the recipe book/instruction manual that came with your air fryer for some guidance there. If you give it a try, please stop back and share you thoughts. We’d love to know if it worked well!
Can you bake these instead of frying? I would brush some olive oil onto the baking sheet but I’d like to avoid frying. Thanks.
Sure! That would work!
Followed your recipe exactly and the chicken came out perfect. My son said the chicken was amazing and asked me to start making it weekly. Thank you!
Yay! Love that! Thanks, Colleen!
Perfect. Uncomplicated. Mouth-watering. Did I mention perfect?
Ha! Thank you so much, Peg!
So, so delicious! Excellent paired with steamed green beans and lemon capellini salad.
What a great meal! Thanks for sharing, Lynn!
Crispiest chicken that I ever made.
That is wonderful to hear! Thanks, Bernadette!
Welcome back Suzi!!! Can’t wait to try the crisp chicken will use for my lunches with green salad for work!! Yes I love quick and healthy!!! I use whatever olive oil I buy from u at the time…
That’s wonderful, Diane! Thank you so much for your support!
Have never made chicken this way before but always wanted to try. It turned out so crispy and delicious, will definitely be adding to our meal rotation.
So glad you enjoyed the recipe, Taylor!