With the holidays upon us, I decided to challenge myself to baking something different. I was looking through the latest issue of Cook’s Illustrated and I came across a beautiful French apple tart. The apple slices arranged in the shape of a beautiful blooming flour. At first glance, I thought to myself, this looks complicated.
A few hours later, I was looking in my fridge when my large bag of pears stared back at me demanding action. It was a toss up between making my easy poached pears and a pear tart, and I decided to try my hand at a pear tart. And while I’m at it, I could use some of my good fig preserves!
I’d like to think of my pear tart as the yummier cousin of the Cook’s Illustrated apple tart. Sorry, I’m biased toward pears. But I did end up using their no-fuss pie crust with some modification. Trust me, friends, you’ll want to know how to make this easy no-fuss crust, it will change your baking life!
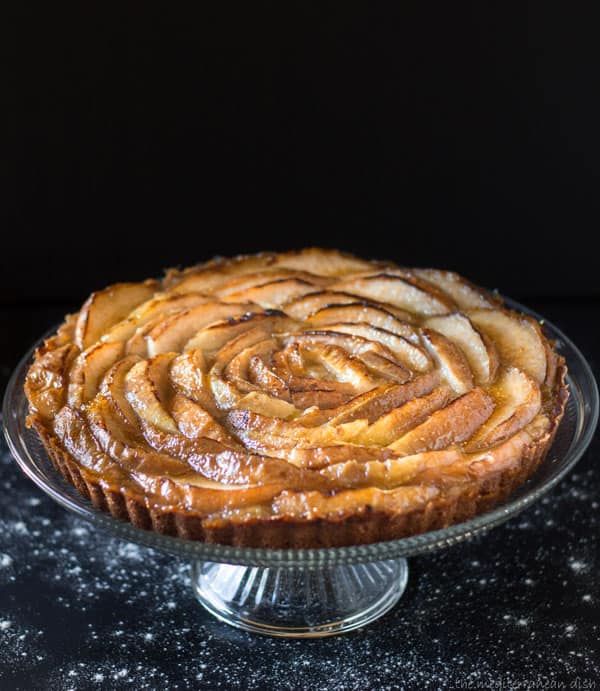
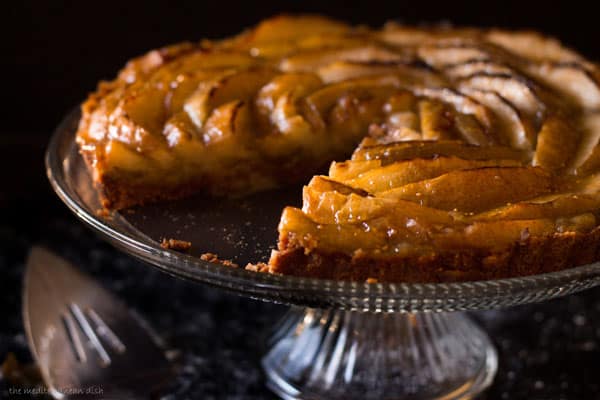
So I did make my French pear tart recipe. The result? A total WIN! Absolute perfection in both presentation and taste! I know I’ll be making it again soon.
Step-by-step photos for this pear tart
(scroll down for the print-friendly recipe)
Position one oven rack to middle, and move the second rack to the very top slot. Preheat oven to 350 degrees F.
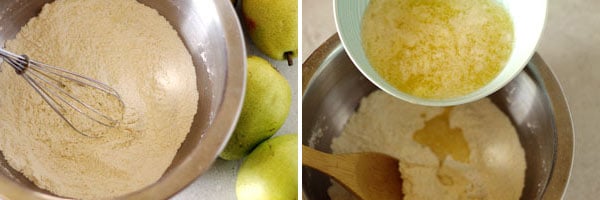
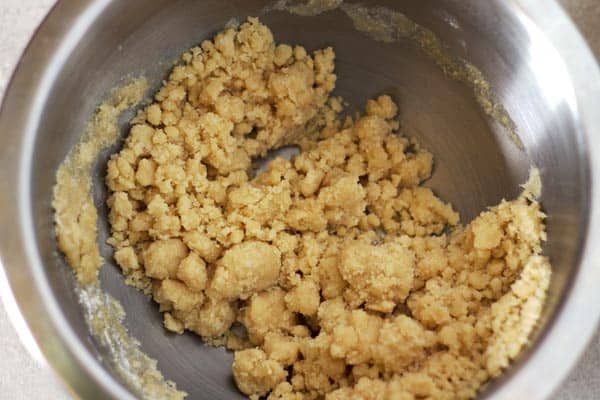
In a bowl, mix together flour, sugar and salt. Add melted butter and combine to form dough.
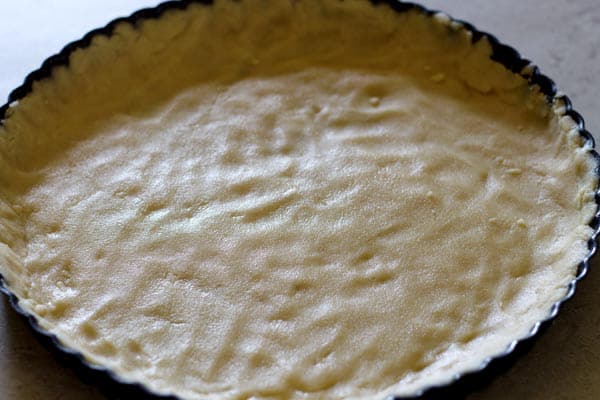
Transfer dough to a 9-inch tart pan with a removable bottom. With your hands press dough down to spread on bottom and onto the rims of the pan.
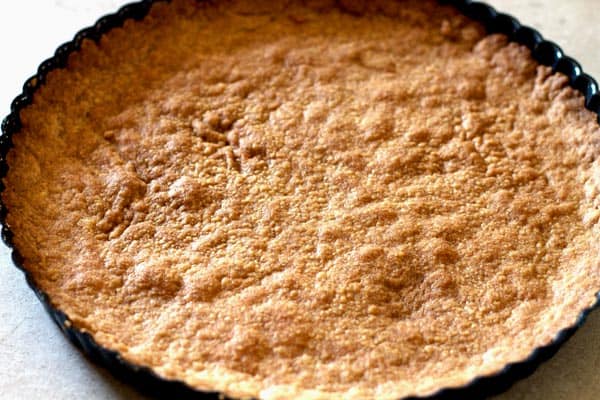
Place in the oven on the middle rack and bake for 30 minutes, or until crust turns golden brown. When ready remove crust from oven and let sit to cool. Leave oven on.
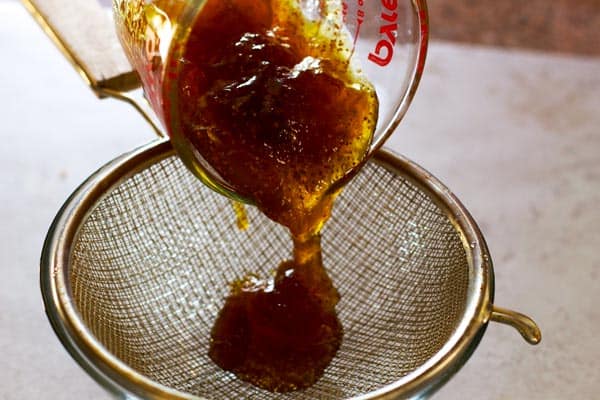
Meanwhile, heat the fig preserves in microwave for about 40 seconds. Pour heated fig preserves through a mesh strainer to separate chunks from liquid.
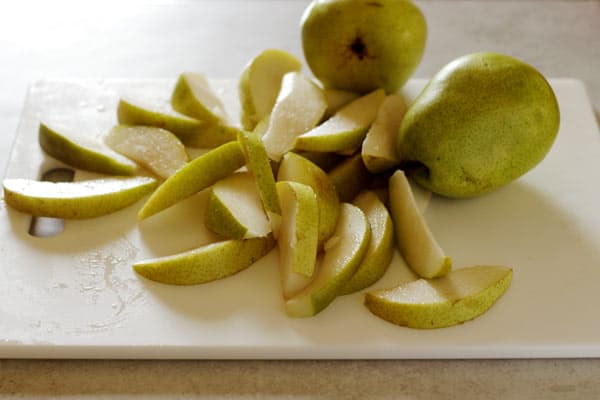
Now, slice five pears into 1/2-inch slices, discarding core.
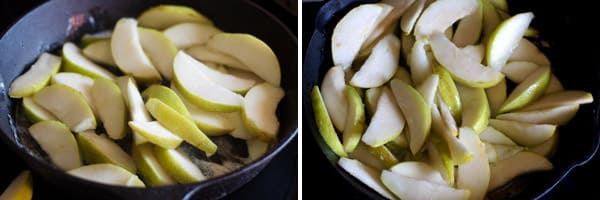
Heat 1 tbsp of butter in a large cast iron skillet. Add pear slices and 1 tbsp water. Cover and cook on medium heat until pears are slightly tender; about 3 minutes. Remove pears onto a large platter and let sit to cool.
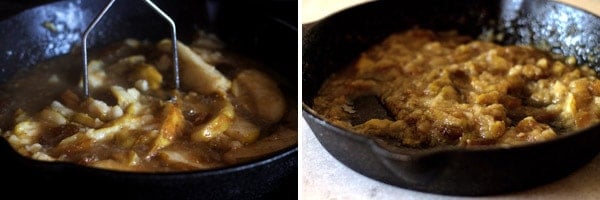
Take the remaining three pears and cut them in the same manner. Now melt 2 tbsp of butter in previously used cast iron skillet. Add newly-sliced pears, chunks of fig reserves, and salt. Cook on medium heat, covered, for ten minutes; stir occasionally until pears are very tender. Take a potato masher and mash the pears and fig reserves into a puree. Let cook for another 5-7 minutes or until pureed mixture reduces and thickens.
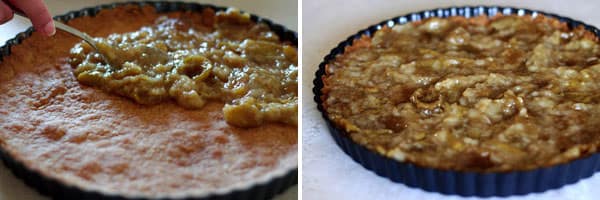
Transfer pear-fig puree onto the now cooled crust; spread evenly.
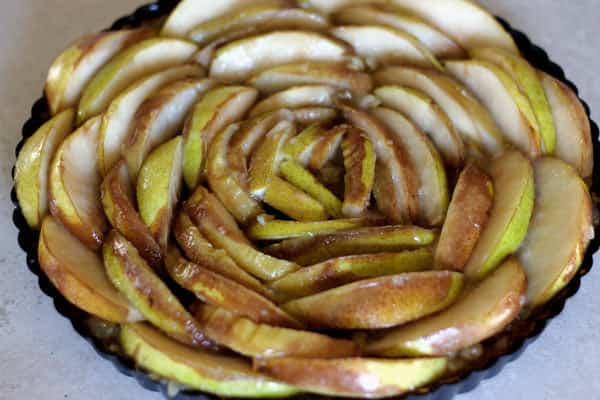
Now, take the cooled pear slices and begin to assemble them in layered circles, starting at the outer edges.
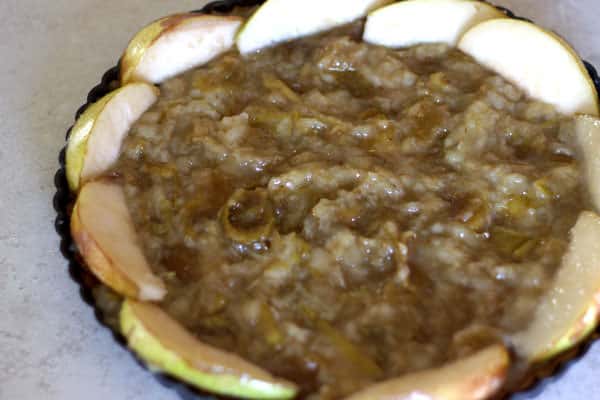
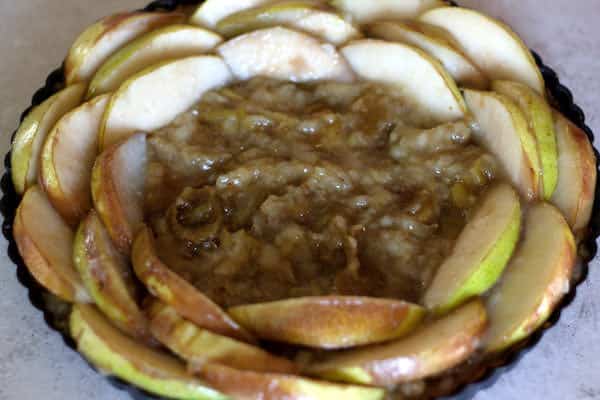
Place tart on the middle rack of the oven. Bake in 350 degree F-heated oven for 30 minutes.
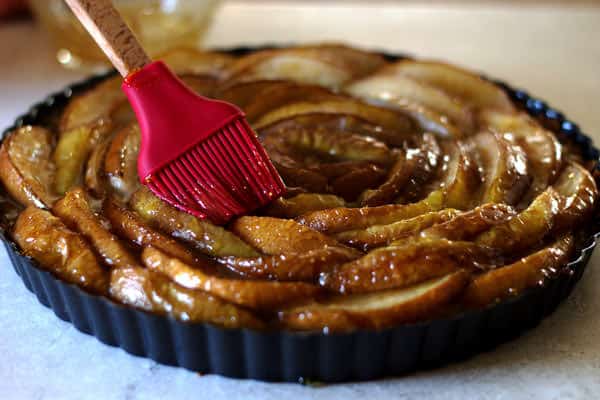
Warm up the strained liquid fig preserves for 20 seconds in the microwave.When tart is ready, remove from oven and brush surface of the pears evenly with the warmed fig liquid.
Return to oven and place on the top rack. Broil very briefly; watching carefully until pears gain a nice caramelized look.
Remove from oven and let cool for at least 1 1/2 hours before serving.
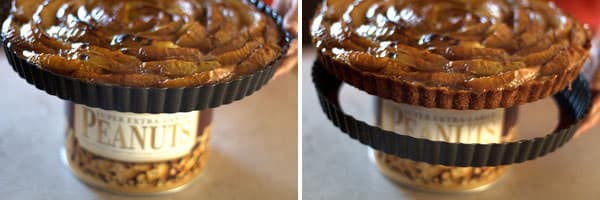
When ready, place the bottom of the tart pan on a wide can of food. Hold the ring part of the pan and carefully slide it downwards.
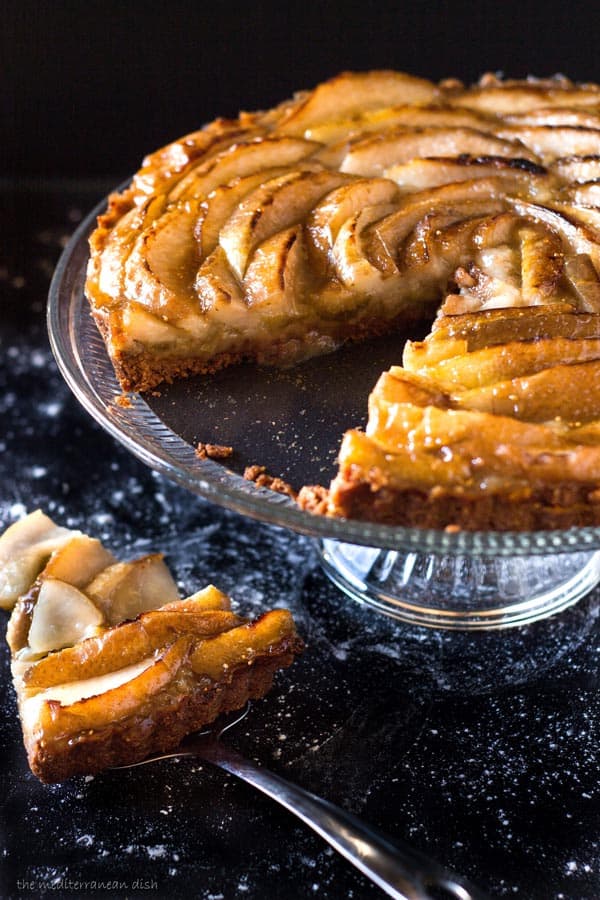
Cut pear fig tart into eight slices and serve. Enjoy!

French Pear Tart
- Total Time: 1 hour 20 minutes
- Yield: serves up to 12
Description
This French pear tart recipe is a total WIN! Absolute perfection in both presentation and taste!
Ingredients
Crust
- 1 1/2 cups all-purpose flour
- 5 tbsp sugar
- 1/2 tsp salt
- 12 tbsp unsalted butter, melted
Filling
- 8 large pears, washed
- 3 tbsp unsalted butter
- 1 tbsp water
- 3/4 cup fig preserves
- 1/4 tsp salt
Instructions
- Position one oven rack to middle, and move the second rack to the top slot.
- Preheat oven to 350 degrees F.
- In a bowl, mix together flour, sugar and salt. Add melted butter and combine to form dough.
- Transfer dough to a 9-inch tart pan with a removable bottom. With your hands press dough down to spread on bottom and onto the rims of the pan.
- Place in the oven on the middle rack and bake for 30 minutes, or until crust turns golden brown. When ready remove crust from oven and let sit to cool. Leave oven on.
- Meanwhile, heat the fig preserves in microwave for about 40 seconds. Pour heated fig preserves through a mesh strainer to separate chunks from liquid.
- Now, slice five pears into 1/2-inch slices, discarding core.
- Heat 1 tbsp of butter in a large cast iron skillet. Add pear slices and 1 tbsp water. Cover and cook on medium heat until pears are slightly tender; about 3 minutes.
- Remove pears onto a large platter and let sit to cool.
- Take the remaining three pears and cut them in the same manner.
- Now melt 2 tbsp of butter in previously used cast iron skillet. Add newly-sliced pears, chunks of fig reserves, and salt. Cook on medium heat, covered, for ten minutes; stir occasionally until pears are very tender.
- Take a potato masher and mash the pears and fig reserves into a puree. Let cook for another 5-7 minutes or until pureed mixture reduces and thickens.
- Transfer pear-fig puree onto the now cooled crust; spread evenly.
- Now, take the cooled pear slices and begin to assemble them in layered circles, starting at the outer edges (see photo).
- Place tart on the middle rack of the oven. Bake in 350 degree F-heated oven for 30 minutes.
- Warm up the strained liquid fig preserves for 20 seconds in the microwave.
- When tart is ready, remove from oven and brush surface of the pears evenly with the warmed fig liquid.
- Return to oven and place on the top rack. Broil very briefly; watching carefully until pears gain a nice caramelized look.
- Remove from oven and let cool for at least 1 1/2 hours before serving.
- When ready, place the bottom of the tart pan on a wide can of food. Hold the ring part of the pan and carefully slide it downwards (see photo).
- Cut pear fig tart into eight slices and serve. Enjoy!
Notes
- Visit our store to browse our spices, olive oils and bundles!
- Prep Time: 20 mins
- Cook Time: 60 mins
- Category: Dessert
- Method: Baked
- Cuisine: French
Try these delicious recipes:
Amazing and very impressive looking dish! I make it all the time. To save time I use canned pears just for the base, and fresh pears on top.
I’m a fan of pears also and super excited to try this recipe. Do you have a suggestion for a fig preserve substitute, due to allergy?
Hi, Beatrice. How about an orange marmalade? I think that would be a delicious substitute here!
I want to make this for Thanksgiving, how far ahead can I make it as the oven is pretty busy on Thanksgiving Day. Thank you!
Hi, Mo. This will keep okay in the refrigerator if you want to make it in advance. For best results, though, if you want to make ahead, we recommend making the crust, pear slices and puree up to 24 hours in advance, and refrigerating them covered, but separately. The next day, assemble everything and add 5 minutes to baking time.
I just made this today and it was utterly delicious! Aside from having to slice the pears, it was not a difficult recipe at all. I didn’t have a tart pan with removable bottom so I used an every day pie plate and it was perfect. Thank you for this scrumptious recipe!
I am intrigued by this recipe as it looks delicious but I eat clean and would make a few changes. I would use almond flour and coconut oil instead of butter and coconut sugar instead of white sugar. The carbs will be much less and the sugar will be less and I think it will be just as delicious. What do you think?
I say go for it! If you do, please stop back and let us know how it turned out!
I’ve made this numerous times and always get many compliments. Beautiful and impressive looking, actually fairly easy to make.
It’s wonderful but wondering if I can use a ceramic pan or is the iron skillet an absolute?
Hi, Nan. Any type of skillet will work here.
Thank you. It’s my favorite thing to bake for a dessert now! It’s really full proof. Happy holidays!
We’re so glad to hear that! Thanks, Nan!
The tart was amazing – light, not overly sweet. Just a perfect desert and so easy to make. Thank you for the recipe!
Lovely. A winner with everyone I’ve baked it for. Love this recipe.
My pears were fairly ripe, so I didn’t cook the top layer and only briefly cooked the ones for the mash. Also, took the blind bake of crust out before 30 min when it was lightly brown.
Favorite with friends and family! And so beautiful.
Thanks so much, Joan!
For me the pears for the filling took so long to cook that it burned before softening enough. I think I would try cooking the pears soft without the fig reserves first and then add them in afterward. Also I could have used more direction on slicing the pears. I sliced them 1/2” thickness but they still seemed too large and thick. That being said, having thrown out the burnt filling and relied on the pear topping and the liquid portion of the fig preserves for the substance of the tart, it looks pretty good.
Wow! Made this yesterday, as a trial run for Thanksgiving dessert. What a wonderful dessert. I couldn’t find fig preserve or syrup, so I used peach jam that I had in the fridge. Tastes incredible. This will definitely make it to our Thanksgiving dessert table.
Awesome! Thanks, Soni!
Easy to make and so delicious!
Thanks so much, Joan!
Do you think you can freeze this
Hello, Theresa! You can perhaps make the pie crust and filling ahead, freeze them separately, and then assemble the pie when you are ready. I have not made this pie and frozen the whole thing, so I’m not sure how well it would thaw.
How do you think this would work an individual tart pans, the ones with the removable bottom?
Hi, Bridget. I have not tried this in individual pans myself, but another reader has had success using 7 1/2″ and 4 1/2″ pans. Would love to hear your thoughts if you give it a go!
This recipe works well for two smaller 7 1/2 inch tart pans.
Thanks for sharing that, Anna!