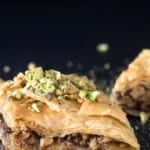
My family’s secret baklava recipe combines layers of honey-soaked crisp phyllo pastry and a cinnamon-scented nut mixture with pistachios, walnuts, and hazelnut. Baklava is the perfect make-ahead dessert because it’s even better the next day!
New to making baklava from scratch? This easy step-by-step tutorial and expert tips will help you make the BEST honey baklava every single time! Be sure to also watch the video below.
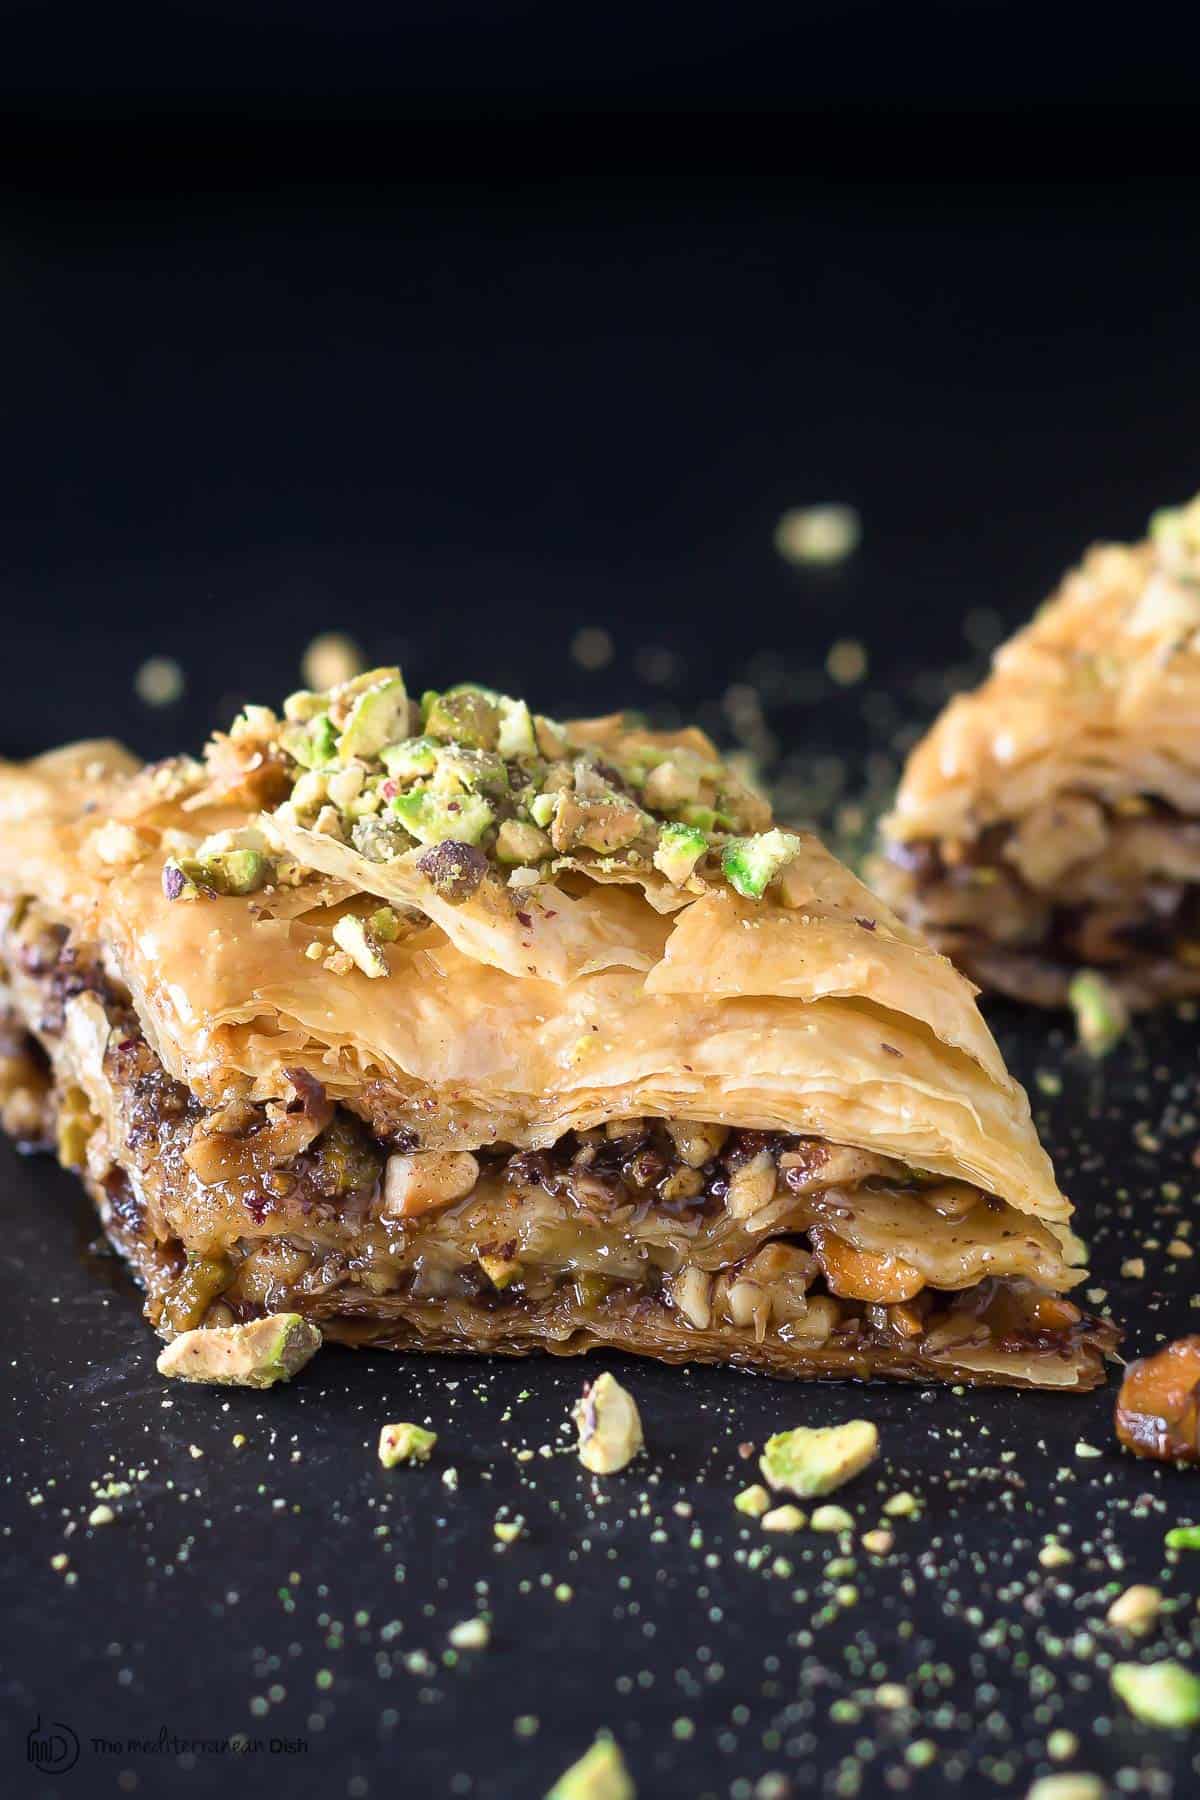
When you grow up eating baklava at every gathering, you become a bit of a baklava snob–at least I did.
To me, nothing rivals homemade baklava. The texture of crisp, flaky phyllo pastry. The crunchy filling. And the warm honey syrup. It is all I want in a dessert.
Making honey baklava at home, be it in this traditional recipe or in my Baklava Sundae, may seem like a big undertaking. Trust me, it’s easier than you think. This fool-proof recipe will have you making Greek baklava like a pro!
And it’s the perfect make-ahead dessert, so you never have to rush the process!
What is Baklava?
Baklava is a sweet dessert made of layers of flaky phyllo pastry filled with crushed nuts and sweetened with honey syrup.
What is traditional baklava made of?
Traditional Turkish baklava, also known as fistikli baklava or pistachio baklava is typically made of phyllo dough, finely crushed pistachios, butter, and a simple syrup made of sugar, water, and lemon juice.
You’ll find many variations of this beautiful dessert from Middle Eastern baklava, where the simple syrup is scented with rosewater, to Greek baklava with walnuts and a generous sprinkle of cinnamon within.
This recipe leans toward Greek baklava, although with my own very nutty Egyptian twist (it’s all in the nut mixture).
Can you use other nuts?
Pistachios or walnuts are the most commonly used nuts. But you don’t have to use just one or the other. I love to use a combination of nuts and plenty of them! My favorite thing about this version of Greek baklava is that it uses a mixture of three different nuts–pistachios, walnuts, and hazelnuts– along with cinnamon, pinch of ground cloves, and a sprinkle of sugar.
The nuts are chopped, but to get the perfect bite, don’t grind them too finely. This baklava recipe is a bit on the nutty side and no one is ever mad about it! But you can totally make this recipe your own and change the nut mixture to your liking.
Let’s take a look at what all goes in baklava recipe from scratch…
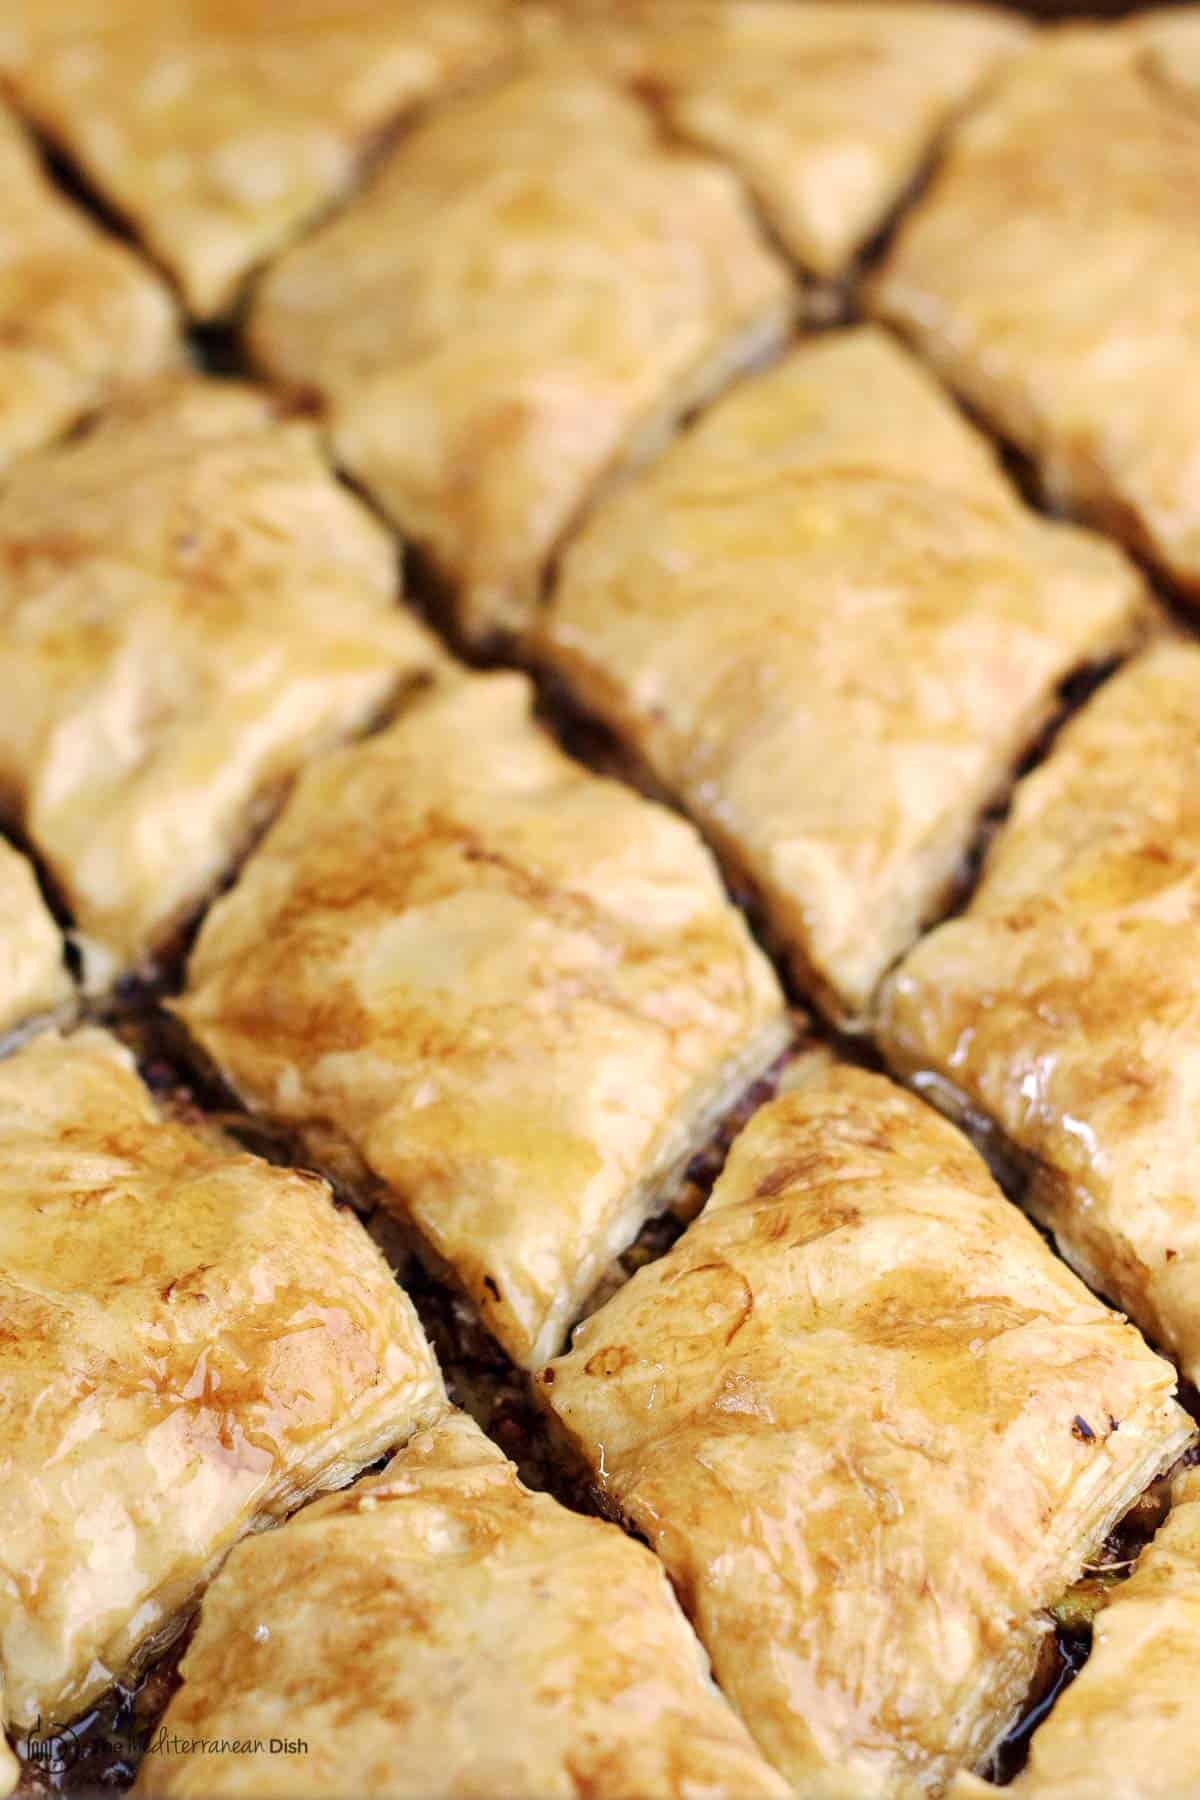
Baklava Ingredients
When making this baklava recipe, it helps to think of the ingredients list in three different components:
- Phyllo pastry- find frozen phyllo dough in the freezer section next to things like pie crust.
- Nut mixture- pistachios, walnuts, hazelnut, sugar, ground cinnamon, pinch of ground cloves. You can change the nut mixture according to what you have. For example, you can use just walnuts or pistachios, but be sure to have enough of whichever nut you use. And if you’re not a fan of cinnamon, you can omit that.
- Honey syrup- water, sugar, honey, and lemon juice. To infuse the syrup with more flavor, I add two more completely optional items, orange extract and whole cloves.
How to Make Baklava: Step-by-Step
My guide for how to make baklava
- Preheat oven to 350 degrees F
- Make the Honey Syrup
Place the sugar and water in a saucepan and heat stove-top, stirring occasionally, until sugar dissolves. Add the honey, orange extract, and whole cloves (cloves are optional here); stir to mix. Bring to a boil, then lower heat and let simmer for about 25 minutes. Remove syrup from heat. Add lemon juice. Remove the whole cloves and let the syrup cool completely (it will thicken a little bit).
- Make the Nut Mixture
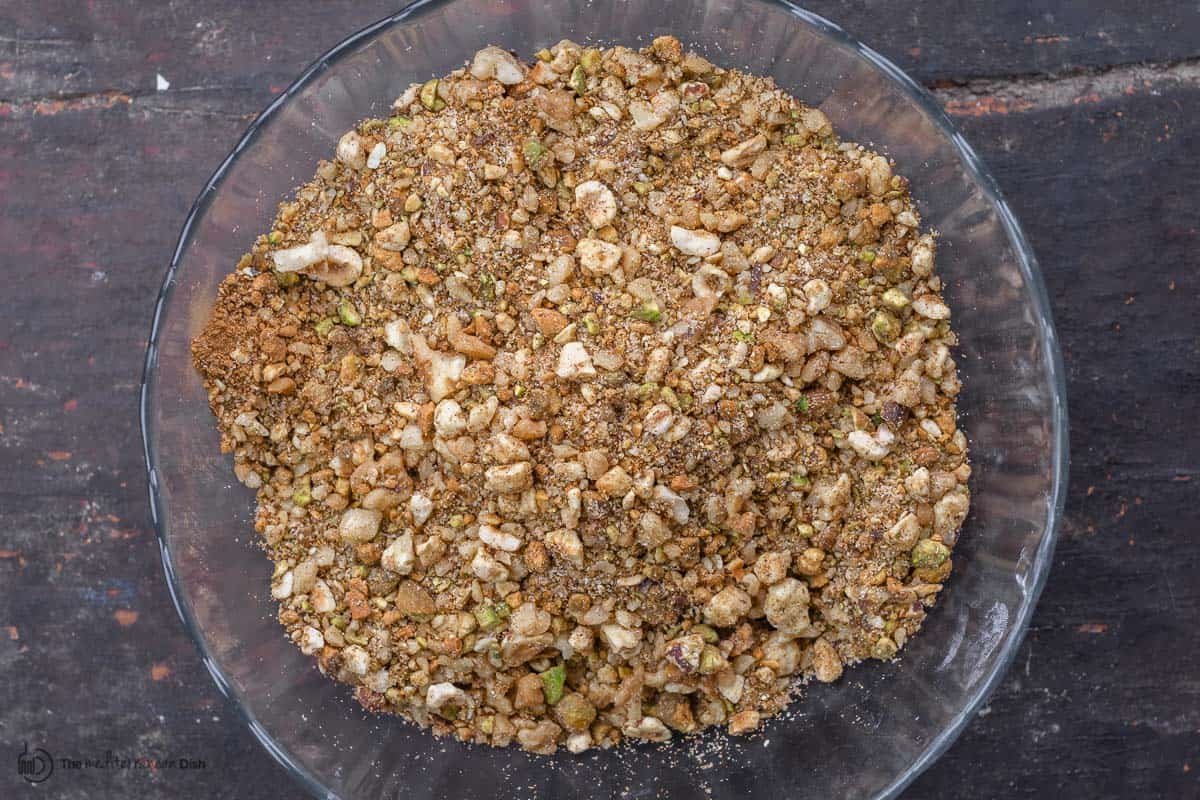
In the bowl of a food processor fitted with a blade, add the pistachios, walnut, and hazelnuts. Pulse a few times to chop. Transfer to a large mixing bowl and add sugar, cinnamon, and ground cloves. Mix well to combine.
- Prepare the Phyllo Pastry
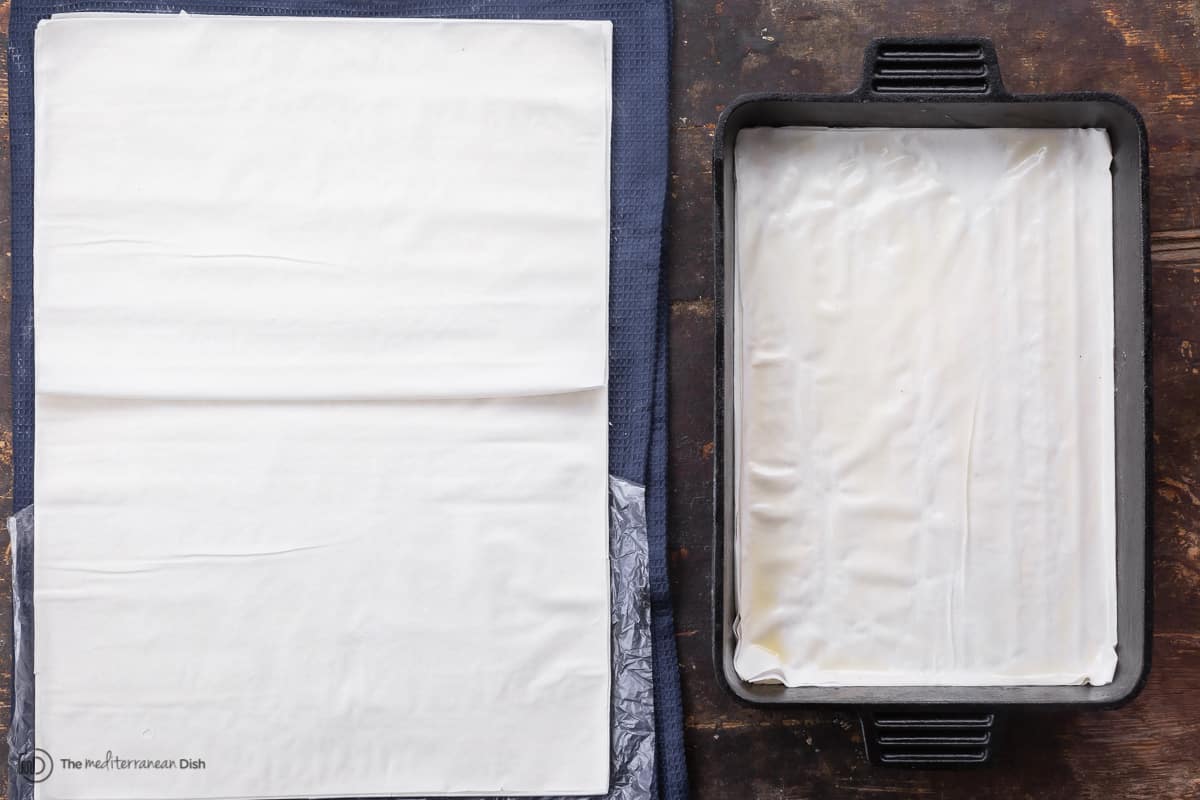
Carefully unroll the thawed phyllo pastry and place the sheets in between two clean kitchen towels. This will help keep the phyllo from breaking while you work.
- Assemble the First Few Layers of Baklava
Prepare a 9”x 13”x 2” baking pan. Brush the interior of the baking pan with some of the melted butter.
To assemble the baklava, take one sheet of phyllo and place it in the pan (for this size pan, I typically fold my phyllo sheet in half, and it fits perfectly. You can also do a bit of trimming using a pair of kitchen shears). Brush the top of the phyllo sheet with the melted butter.
Repeat this process a few more times until you have used up about 1/3 of the phyllo pastry, each layer being brushed with the melted butter. - Distribute some of the Nut Mixture
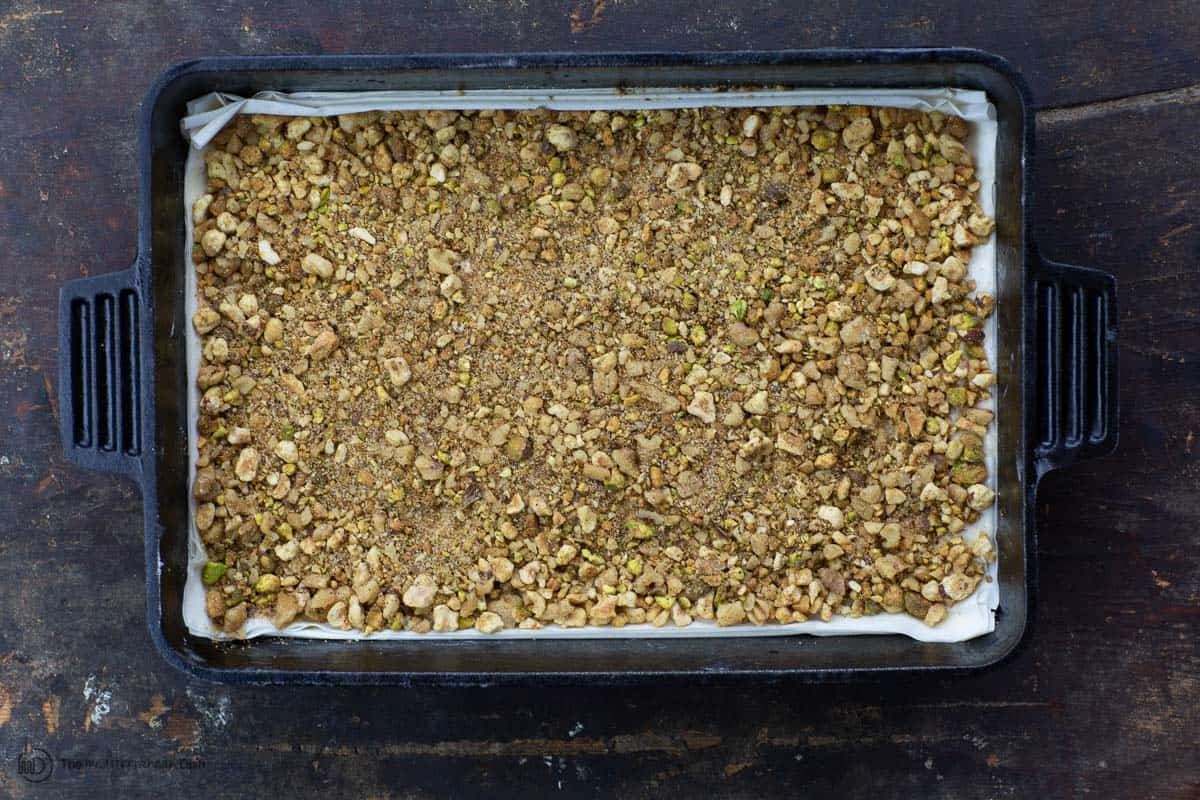
Now, distribute about ½ of the nut mixture evenly over the top layer of phyllo.
- Continue Assembling the Baklava
Continue assembling the baklava, one sheet of phyllo pastry at a time using another 1/3 of the phyllo. Again, brush each layer with a bit of the melted butter.
Distribute the remaining ½ of the nut mixture evenly over the top layer of phyllo.
Finish the remaining 1/3 of the phyllo pastry following the same process, laying one folded sheet at a time and brushing each layer with melted butter.
Brush the very top sheet of phyllo with butter. - Cut the Baklava into Pieces
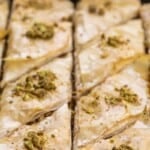
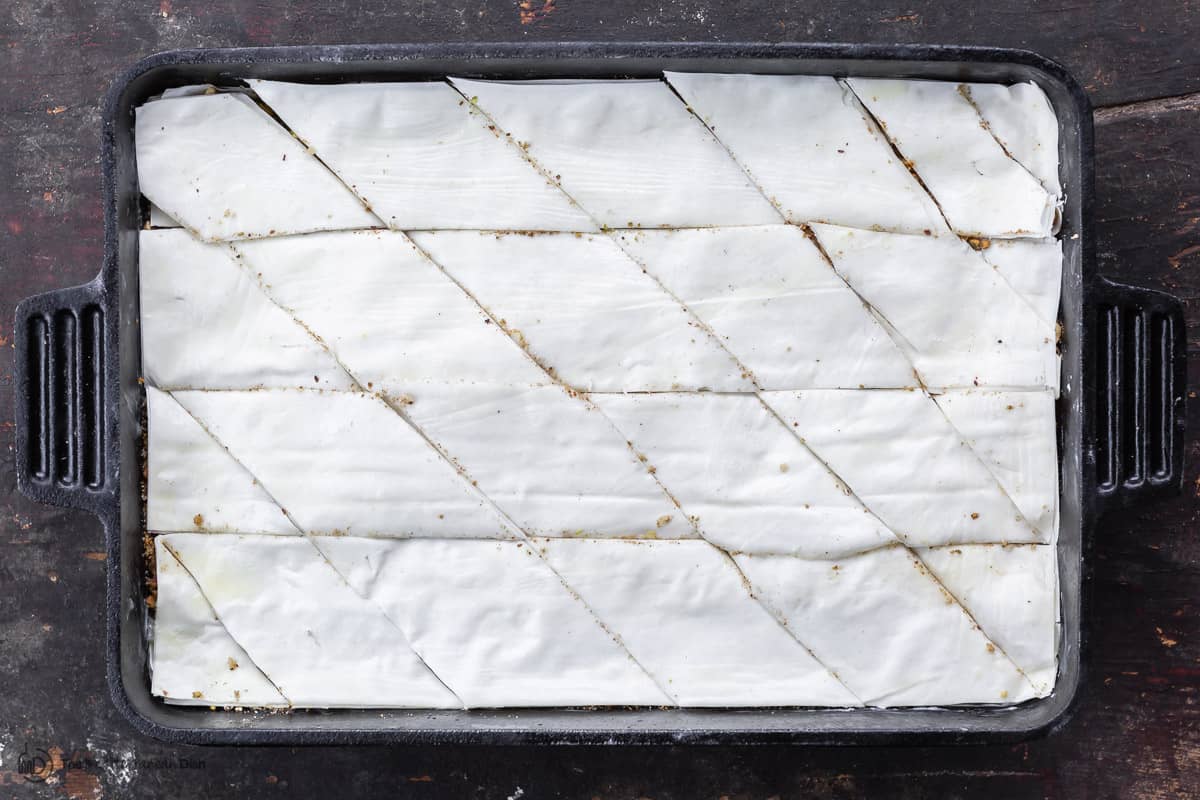
Using a good sharp knife, cut the pastry into diamond shaped pieces (anywhere from 24 to 36 pieces) about ½-inch deep. (See the video to see exactly how I cut baklava)
- Bake:
Place the baklava dish on the middle rack of your heated oven. Bake anywhere from 35 to 45 minutes or until the top of the baklava turns golden and a skewer inserted in the center comes out clean. (IMPORTANT…Because ovens vary, be sure to check your baklava half-way through baking).
- Pour Syrup. Let COOL. Garnish:
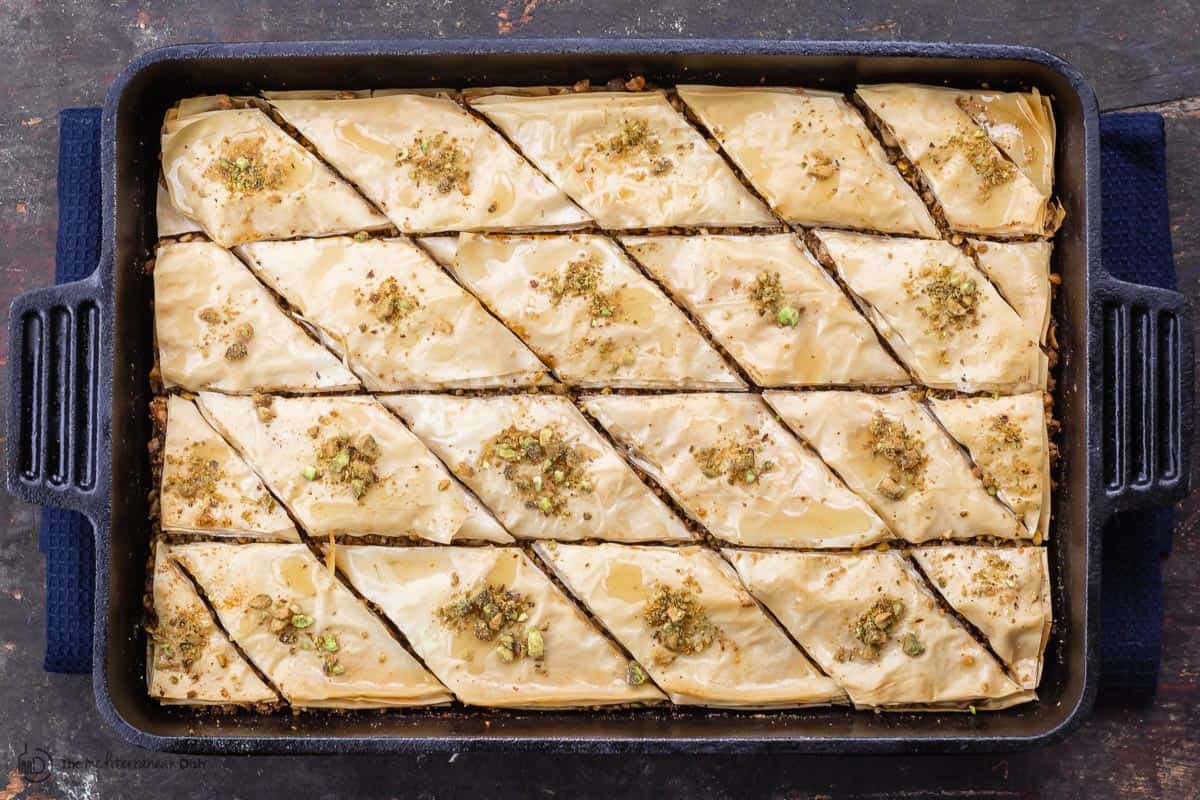
As soon as you remove the baklava from the oven, pour the cooled syrup all over the hot baklava. Make sure you disribute the syrup evenly.
Let the baklava cool completely (it’s best if you leave it for several hours, or at least 1 hour, to allow the flaky phyll.o layers to absorb the honey syrup completely).
Cut through the pieces you marked earlier. And if you like, garnish with a little sprinkle of pistachio before serving.
Important Tips
There are a couple of things that intimidate people when it comes to making baklava. One for sure is how to work with paper-thin phyllo dough. I shared a couple tips on that with my spanakopita recipe, but let’s go over those again in addition to a couple more baklava-specific tips that will ensure you make the BEST baklava ever:
- Thaw your phyllo dough properly. Too much moisture will make the phyllo sticky and hard to manage. Do not remove the phyllo (fillo) from the package, place it in the fridge 12-14 hours until ready to use.
- Place the phyllo pastry sheets between two clean towels while you work. Unless you are able to work quickly, before you begin to assemble the baklava, place the thawed phyllo sheets in between two clean kitchen towels. This helps the phyllo sheets remain lenient so they won’t tear or break too much.
- Prepare your honey syrup ahead. It’s important that the honey syrup is cool when it hits the freshly-baked hot baklava. This way, the hot baklava layers will absorb as much of the syrup as possible and you’ll have perfectly honeyed baklava. You have enough time to make the syrup while the baklava is baking, but be sure you take it off heat and set it in a cool place.
- Chop the nuts well, but don’t grind them too finely into a paste or powder. Obviously you don’t want the nuts nestled in the baklava to be too big or make it hard to bite on the beautiful pastry. But be sure not to grind the nuts too finely that you end up with dust for your filling. You want to still be able to taste the nuts and enjoy their texture.
- Cut the assembled baklava into pieces before baking. So important, before you bake it, use a sharp knife to cut the pastry into pieces (I cut my baklava into larger diamond shaped pieces. You can usually get about 24 up to 36 pieces depending on their size). Why cut it before you bake it? Because once phyllo pastry is baked, it’s super crunchy and if you try to cut through it then, it’ll break into a mess.
- Make your baklava one night in advance! Hooray for the perfect make-ahead dessert! Baklava is even better the next day when it’s had a chance to completely soak in the honey syrup. You can store it covered at room temperature for one night. Be sure it is completely cooled before you cover it (so important)
How to keep baklava from getting soggy?
Remember my one tip about hot baklava and cool syrup? This is also the key to keep your honey baklava from getting soggy. The hot flaky phyllo will properly absorb the cooled syrup while remaining crispy.
If the syrup was also hot, or if the syrup and baklava were both cool, the syrup will kind of collect in a bit of a pool and will not be absorbed properly. This will cause the beautiful pastry you worked so hard on to get soggy.
How to store baklava?
The good news is baklava is one of the few desserts you can make a few days ahead. It will keep well for up to 2 weeks stored in an air-tight glass container at room temperature or in the fridge.
Personally, I move any leftover baklava to the fridge after a few days, but keeping it at room temperature does preserve it’s crispy texture better.
You’ll know when your baklava is nearing the end of its life when it starts to dry out.
You can freeze already baked baklava for up to 4 months, if you like. It’s good to store it in small batches so you don’t have to thaw out the entire pan when you need a treat. Thaw in the fridge overnight or at room temperature for a few hours.
Watch the video to make it:
Craving more phyllo recipes? Try apple strudel, Spanakopita, or this savory meat pie!
For all recipes, visit us here. Check out our Mediterranean diet recipes.
JOIN MY FREE E-MAIL LIST HERE.
SHOP OUR ONLINE STORE FOR QUALITY OLIVE OILS, ALL-NATURAL SPICES AND MORE.
Print
Baklava Recipe- How to Make Baklava
- Total Time: 1 hour 10 minutes
- Yield: 24 pieces 1x
Description
My family’s secret baklava recipe combines layers of honey-soaked crisp phyllo pastry and a cinnamon-scented nut mixture with pistachios, walnuts, and hazelnut. Baklava is the perfect make-ahead dessert because it’s even better the next day!
Be sure to read through for tips and watch the video to make it.
Ingredients
For the Baklava and Nut Filling
- 6 oz shelled pistachios, coarsely chopped
- 6 oz walnuts, coarsely chopped
- 6 oz hazelnuts, coarsely chopped
- 1/4 cup sugar
- 1 to 2 tbsp ground cinnamon (start with less if you’re not sure)
- large pinch of ground cloves
- 16-oz package phyllo dough, thawed
- 1 1/2 to 2 sticks of unsalted butter (up to 16 tbsp), melted
For the Honey Syrup
- 3/4 cup sugar
- 1 cup cold water
- 1 cup honey
- 1 tbsp orange extract (optional)
- 5 whole cloves
- 1 lemon, juice of
Instructions
Preheat the oven to 350 degrees F.
Make the Honey Syrup: Place the sugar and water in a saucepan and heat stove-top, stirring occasionally, until sugar dissolves. Add the honey, orange extract if using, and whole cloves; stir to mix. Bring to a boil, then lower heat and let simmer for about 25 minutes. Remove syrup from heat and let cool to lukewarm. Add lemon juice. Remove the whole cloves.
Make the Nut Mixture: In the bowl of a food processor fitted with a blade, add the pistachios, walnut, and hazelnuts. Pulse a few times to chop. Transfer to a large mixing bowl and add sugar, cinnamon, and ground cloves. Mix well to combine.
Prepare the Phyllo Pastry: Unroll the thawed phyllo pastry and place the sheets in between two clean kitchen towels. This will help keep the phyllo from breaking while you work.
Assemble the Baklava: Prepare a 9”x 13”x 2” baking pan. Brush the interior of the baking pan with some of the melted butter. To assemble the baklava, take one sheet of phyllo and place it in the pan (for this size pan, I typically fold my phyllo sheet in half, and it fits perfectly. You can also do a bit of trimming using a pair of kitchen shears). Brush the top of the phyllo sheet with the melted butter.
Repeat this process a few more times until you have used up about 1/3 of the phyllo pastry, each layer being brushed with the melted butter.
Now, distribute about ½ of the nut mixture evenly over the top layer of phyllo.
Continue assembling the baklava, one sheet of phyllo pastry at a time using another 1/3 of the phyllo. Again, brush each layer with a bit of the melted butter.
Distribute the remaining ½ of the nut mixture evenly over the top layer of phyllo.
Finish the remaining 1/3 of the phyllo pastry following the same process, laying one folded sheet at a time and brushing each layer with melted butter. Brush the very top sheet of phyllo with butter.
Cut the Baklava Pastry Into Pieces: Using a sharp knife, cut the pastry into 24 diamond shaped pieces (you can get up to 36 smaller pieces). (Review the tutorial above to see how I cut baklava).
Bake: Place the baking dish on the middle rack of your heated oven. Bake anywhere from 35 to 45 minutes or until the top of the baklava turns golden and a skewer inserted in the center comes out clean. (IMPORTANT…Because ovens vary, be sure to check your baklava half-way through baking).
Pour Syrup Over Hot Baklava: As soon as you remove the baklava from the oven, pour the cooled syrup all over the hot baklava.
Cool Completely: Allow baklava to sit for a few hours before serving or for at least 1 hour. Cut through the earlier marked pieces. Serve with a garnish of chopped pistachios, if you like.
Notes
- Cook’s Tip: Before you begin thaw the baklava pastry package in the fridge overnight (review package instructions). Take it out of the fridge 1 hour before you start.
- Cook’s Tip: To save time, while the syrup is simmering begin to assemble the baklava.
- Let Baklava Sit a While Before Serving: Make sure baklava sits cools completely before serving. Baklava is even better the next day when it’s had time to absorb the syrup.
- Storage and Freezer Instructions: Be sure baklava is compeletly cool before storing. Cover it very well and store it at room temperature the first night, if you like. To store for a longer period, transfer the baklava to airtight glass containers and leave at room temperature or in the fridge for a few days or freeze for later use. Thaw frozen baked baklava in the fridge overnight or at room temperature for a few hours before serving.
- Visit our online shop for quality Mediterranean ingredients including extra virgin olive oils and spices
- Prep Time: 30 mins
- Cook Time: 40 mins
- Category: Dessert
- Method: Baked
- Cuisine: Mediterranean
This post first appeared on The Mediterranean Dish in 2014 and has been recently updated with new media and information for readers’ benefit. Enjoy!
Was the baking dish you used cast iron? If not can cast iron be used for this recipe? Thanks
Yes! The baking dish here was cast iron! Really works with any sort of baking dish.
Can you substitute pecans instead of the hazelnuts.
Sure, Catherine! That will work!
Thanks so much.
I posted another question.
Not quite enough syrup for the baklava could I add not syrup to cope baklava
Hi Suzy.
Just made your brilliant honey baklava, which we ate with Cornish clotted cream. They are made for one another, absolutely delicious.
Some of our nut mixture tasted a little burnt, did we have the oven too hot?
Will be making this as a regular treat and can see us busy at Christmas making as gifts for friends.
Thanks
Hi, Pauline. So glad you enjoyed the recipe! Hard to say exactly why the nut mixture tasted a bit burnt. Yes, it could have been that your oven got a bit too warm.
Excellent baklava! Initially, I almost went with 1 tablespoon of cinnamon, so it wouldn’t be overpowering, but 2 ended up being perfect for me. I also added a teaspoon of coriander to the nut mixture and was very pleased with it!
Thanks for sharing this recipe!
I’m looking forward to trying this recipe! If using a glass pan, would you adjust the baking temperature or time? Thank you.
Hi, Yasamin. You shouldn’t have to, but it just depends on your personal oven a bit. I would could at the suggested temperature, but just keep a close eye on it.
Can’t wait to try
Too sweet & my baklava got stuck to the baking tray… recipe does not say use parchment paper but I guess I should have used my own better judgement.
I would not recommend this recipe due to the sheer sweetness.
Baklava is meant to be sweet:-)
Does it get soggy after freezing?
Hi, Ann. It definitely won’t be quite as crispy after freezing, but in our experience, it doesn’t get totally soggy, either.
Wondering if EVERY layer of phylo needs to be brushed with butter? It took me 3 sticks of butter!! And what if i only brushed every 2nd layer? I love all of your recipes! Thank you for sharing!!
Hi, Debbie. For best results, we really do recommend brushing each layer of phyllo with a very thin layer of butter.
Have you ever made this using gluten free phyllo?
Hi, Pam. We haven’t yet. Gluten free phyllo is hard to come by. If you’ve found some, we’d love a recommendation!
I’ve seen gluten free baklava made using rice paper. Might kind of work.
This sounds like a very interesting idea, Kathleen! We may have to test that out ourselves!
Would it be good if I put a couple star anise in the honey syrup?
Hi, Brittney! Yes… delish :).
May I request more information on the subject? All of your articles are extremely useful to me. Thank you!
Hi,
I am wondering since the honey mixture needs to be totally cool are you able to make it the night before? Thanks
Hi, Cathy. Yes! That should be just fine. Enjoy!
If the syrup is made the night before do you put it in the fridge or leave it out?
I would go ahead an store it in the fridge. Hope you enjoy the recipe!
I think cloves takes baklava to the next level, and I can’t imagine it without pistachios. Baklava is my “last meal” meal, if it ever comes to that.
Do you think a 9x13x1 pan would work? It might actually be 1.25” tall. I have an oddball pan that I could hopefully use!
Hi, Sarah. That might be cutting it a bit close, but you could always give it a try.