If working at an oyster bar taught me anything, it’s that there is a right way to open a raw oyster! Follow this essential guide to becoming an oyster shucking machine including how to serve, dress, clean, buy, and–most importantly—how to shuck oysters like a pro.
My first day on the job shucking oysters looked like it would be my last. As the orders piled up, I quickly got “in the weeds,” or restaurant lingo for hopelessly behind. Luckily, the owner was a patient guy. While helping me work through the backlog of orders, he gave me an expert tutorial on how to shuck oysters successfully and–crucially lacking from that first day–quickly!
If you love eating oysters but are intimidated by shucking them at home, gather your courage! Our guide will help you become an expert at choosing, storing, serving, and yes, opening them. You’ll soon be grilling them, baking them, and slurping them down raw with just a spoonful of mignonette sauce in no time.
While I didn’t master shucking that first day on the job, or the next, eventually I gained skill and speed. My best tip, though, is to be patient. Take your time and practice. Eventually, you’ll get the hang of it. Then you, too, can impress friends with your new party trick!
Table of Contents
What You’ll Need to Shuck Oysters
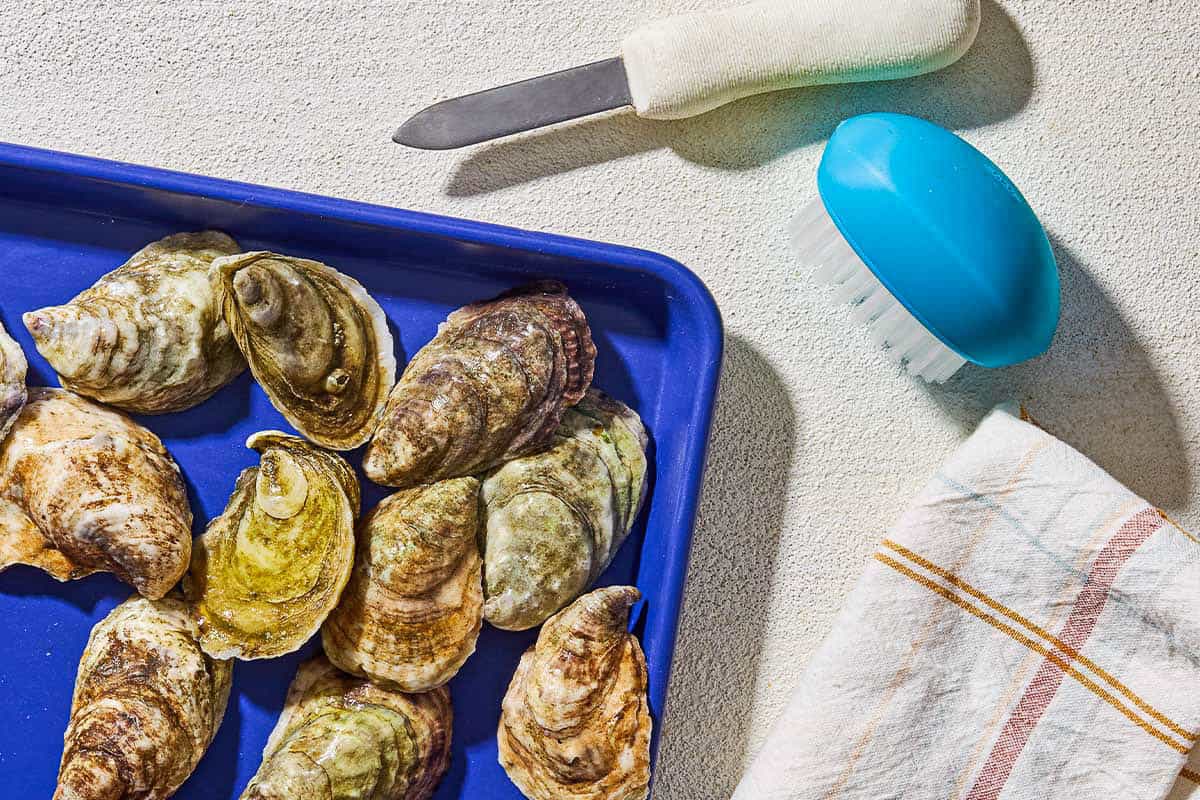
You only need 2 things to shuck an oyster: the freshest raw oysters you can get your hands on and a knife. That said, it can be dangerous without the proper tools.
- Raw oysters: See our tips for selecting, buying, and storing raw oysters below.
- Oyster knife: Do not attempt to open oysters with a screwdriver or a paring knife! There is a reason that oyster knives exist–they are the best tool for the job. I prefer the sturdy “New Haven” oyster knives for two reasons. First, they have a fat plastic handle that doesn’t slip. Second, their slightly upturned tip helps me get into the oyster’s hinge more easily.
- Protect your hand: Opening oysters can be dangerous work, as it takes a bit of brute force and the knife may suddenly slip. While some people hold the oyster with an oven mitt, I prefer a thick dish towel. Use a towel you don’t mind getting dirty or wet. You can also purchase a food-grade glove for the job.
Where to Buy Oysters
Few ingredients rival the need for freshness quite like an oyster. Here are my tips for buying oysters:
- Buy them from a fishmonger you trust. Ask when they were harvested to make sure they’re fresh.
- If in doubt, inspect the shells. They should be tightly closed, and the oysters should have a whiff of salty seawater to them.
- Smell the oysters. They should have a fresh fresh oyster smell, with no off-putting aroma of rotting, super fishy, or ammonia.
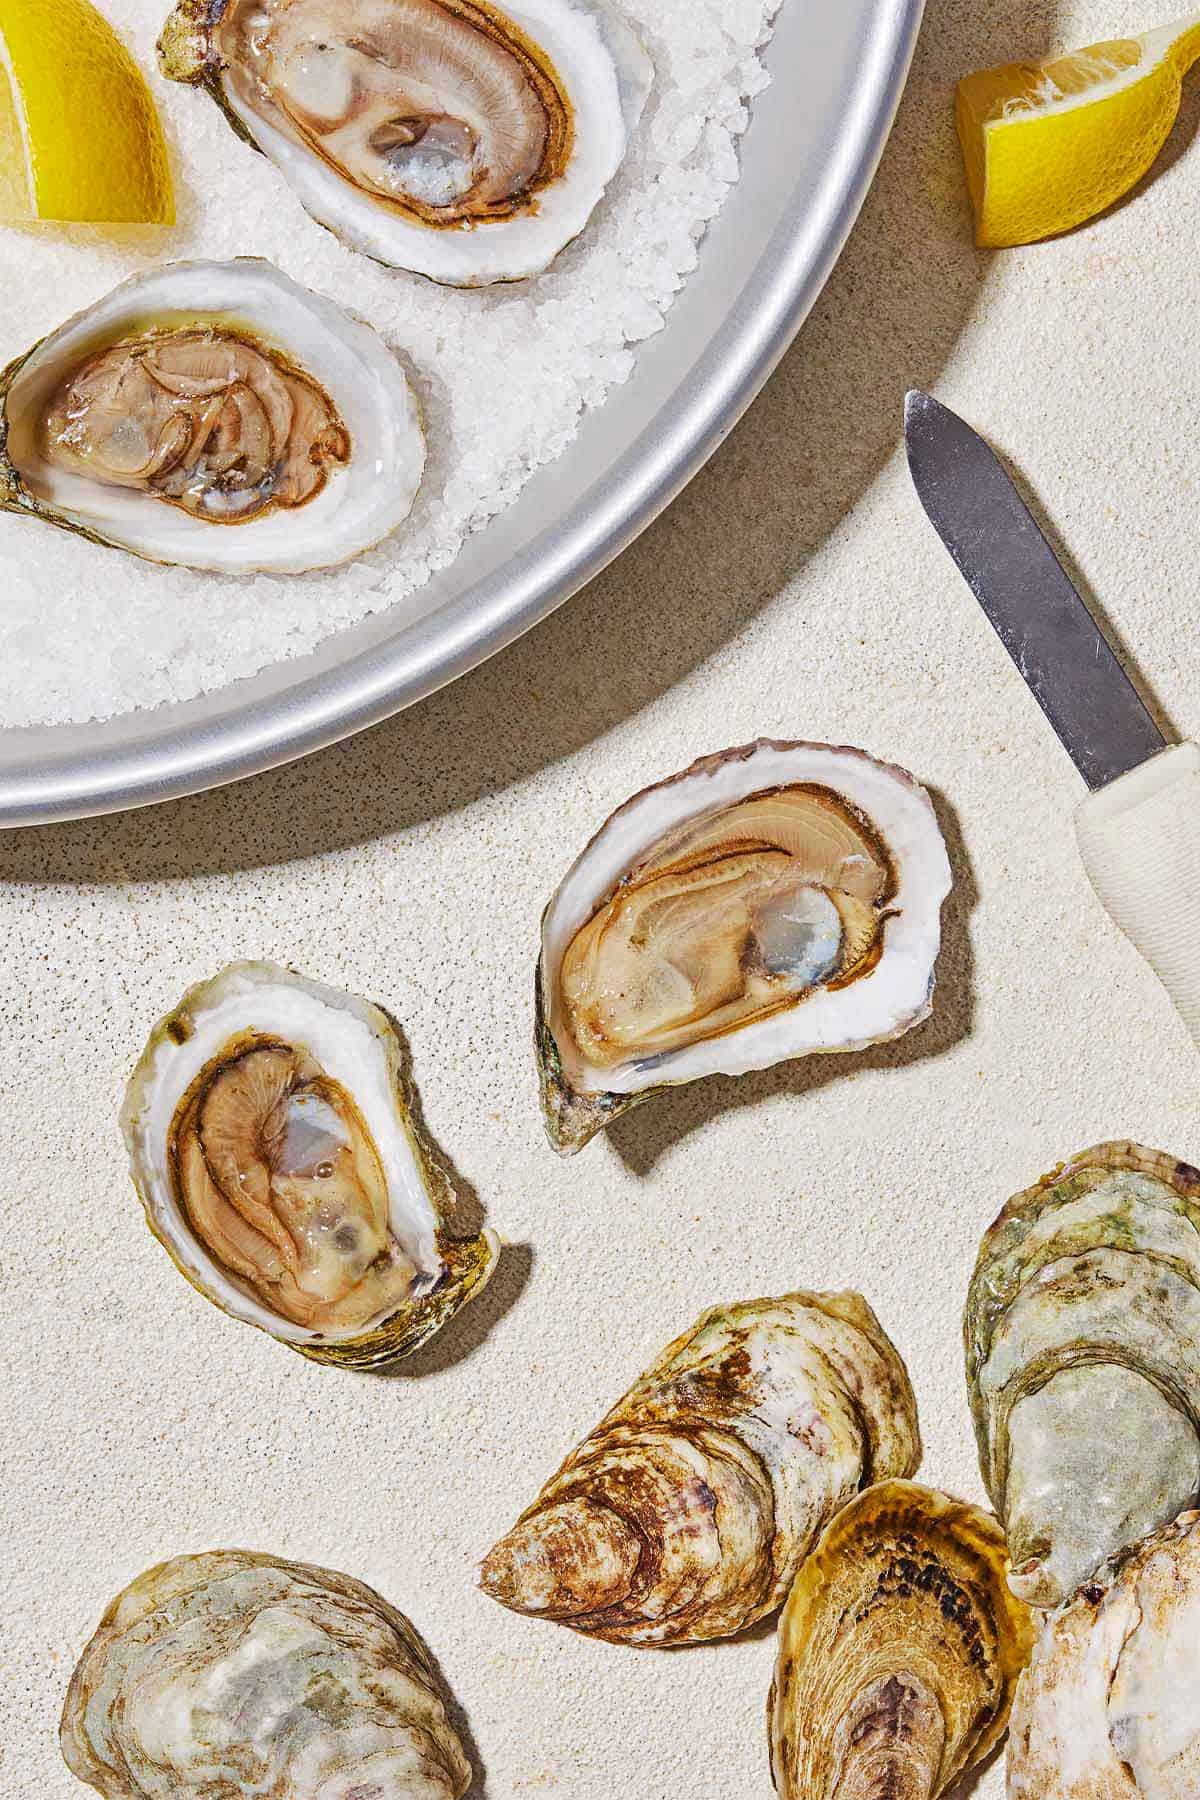
Types of Oysters
Each variety of oyster has its unique taste, texture, and size. Similar to grapes or wines, the flavor of a particular type of oyster is a combination of both its terroir and its variety. In the United States, oysters are grown on both the East and West coasts:
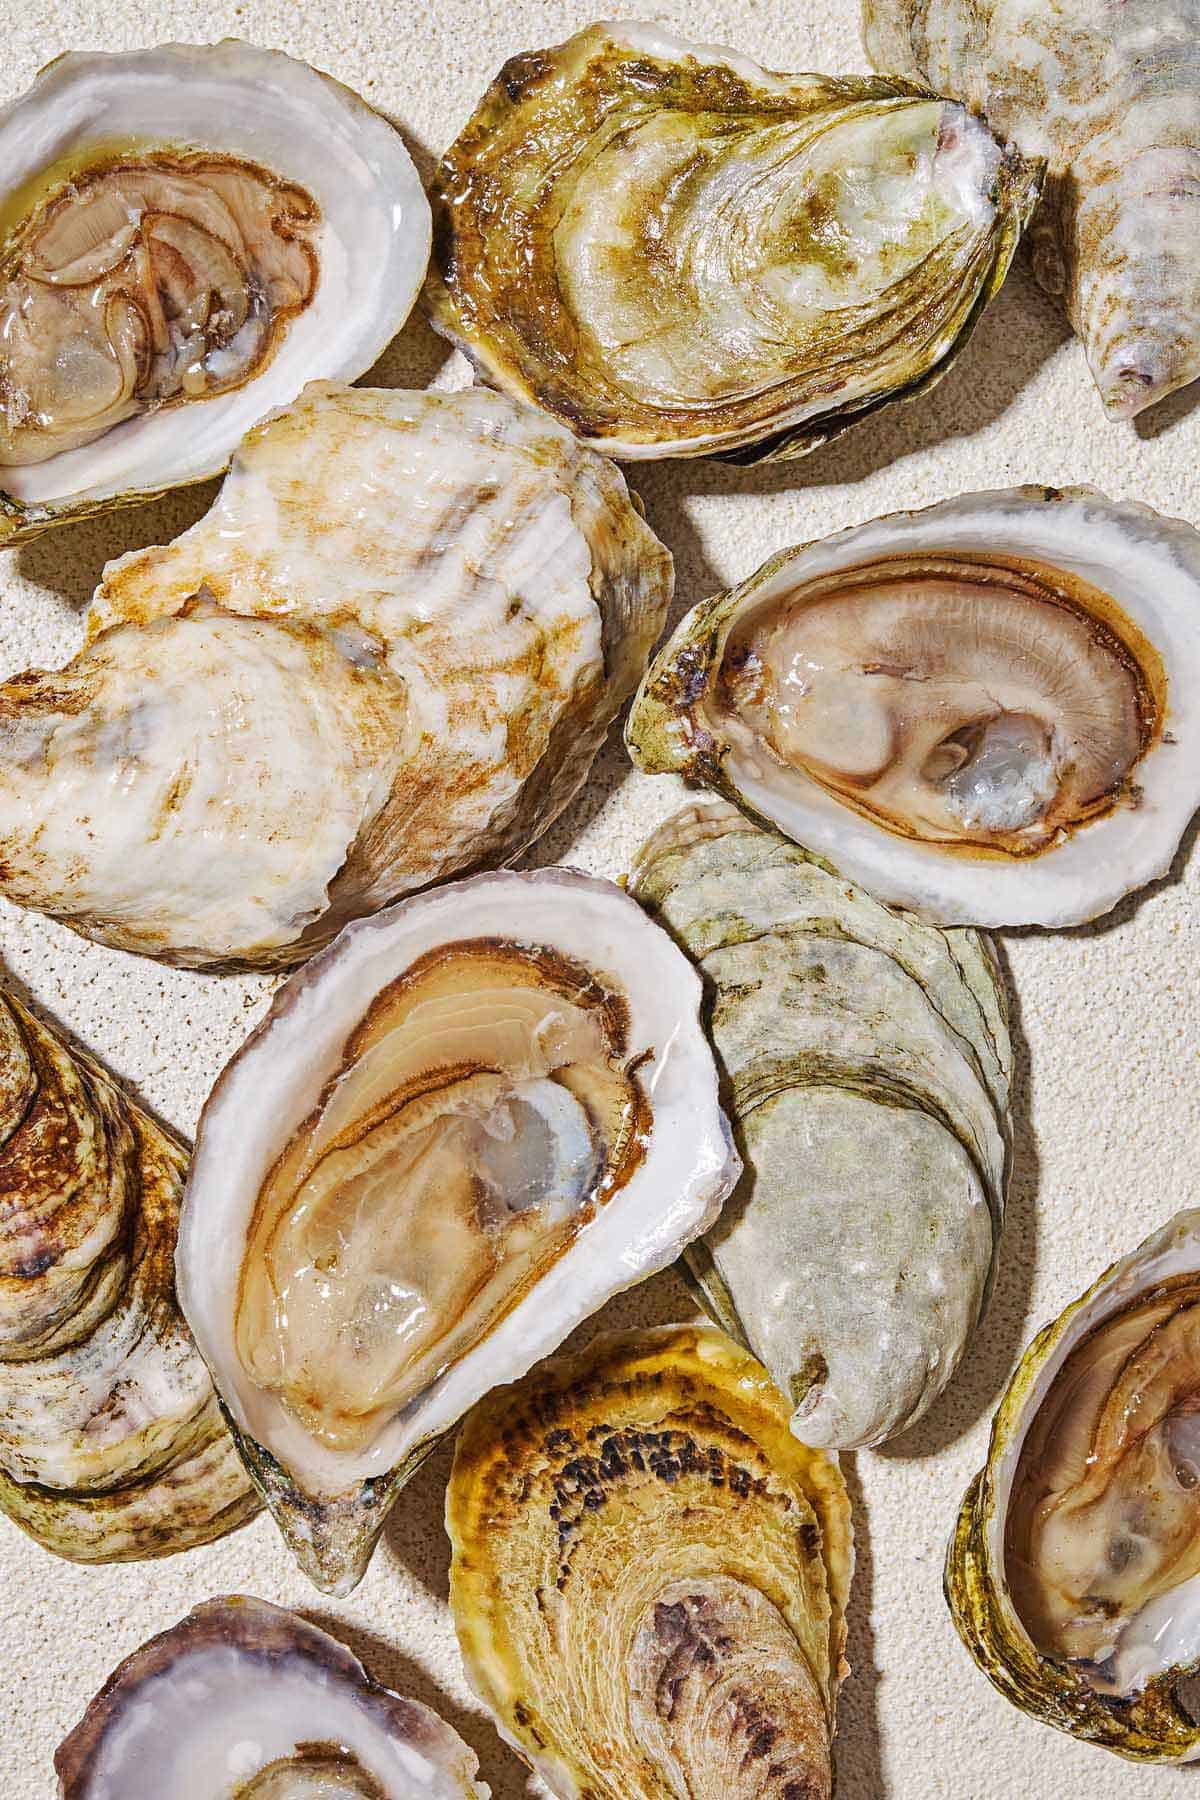
- Atlantic oysters: Grown in the waters from Maine to the Gulf Coast, these oysters typically have a smooth shell and are generally milder and more delicate in flavor than West Coast oysters. Well-known types include the Wellfleet, from Massachusetts, and Blue Point, from Long Island, New York.
- Pacific Oysters: The majority of oysters grown in West Coast waters are from Asia, brought to the US by Japanese immigrants. These typically have a ruffled shell and contain meat that is sweet and plump with a mineral finish. The only native species is the Olympia oyster, a tiny oyster that is grown by specialty producers.
How to Store Fresh Oysters
Live oysters can be stored in the refrigerator for a few days, but it’s best to consume them the day you buy them. To store raw oysters:
- Place the oysters on a small sheet tray and cover with a damp cloth.
- Place them in the coldest part of the refrigerator.
- Never store oysters in a sealed container, as they are alive and need to breathe.
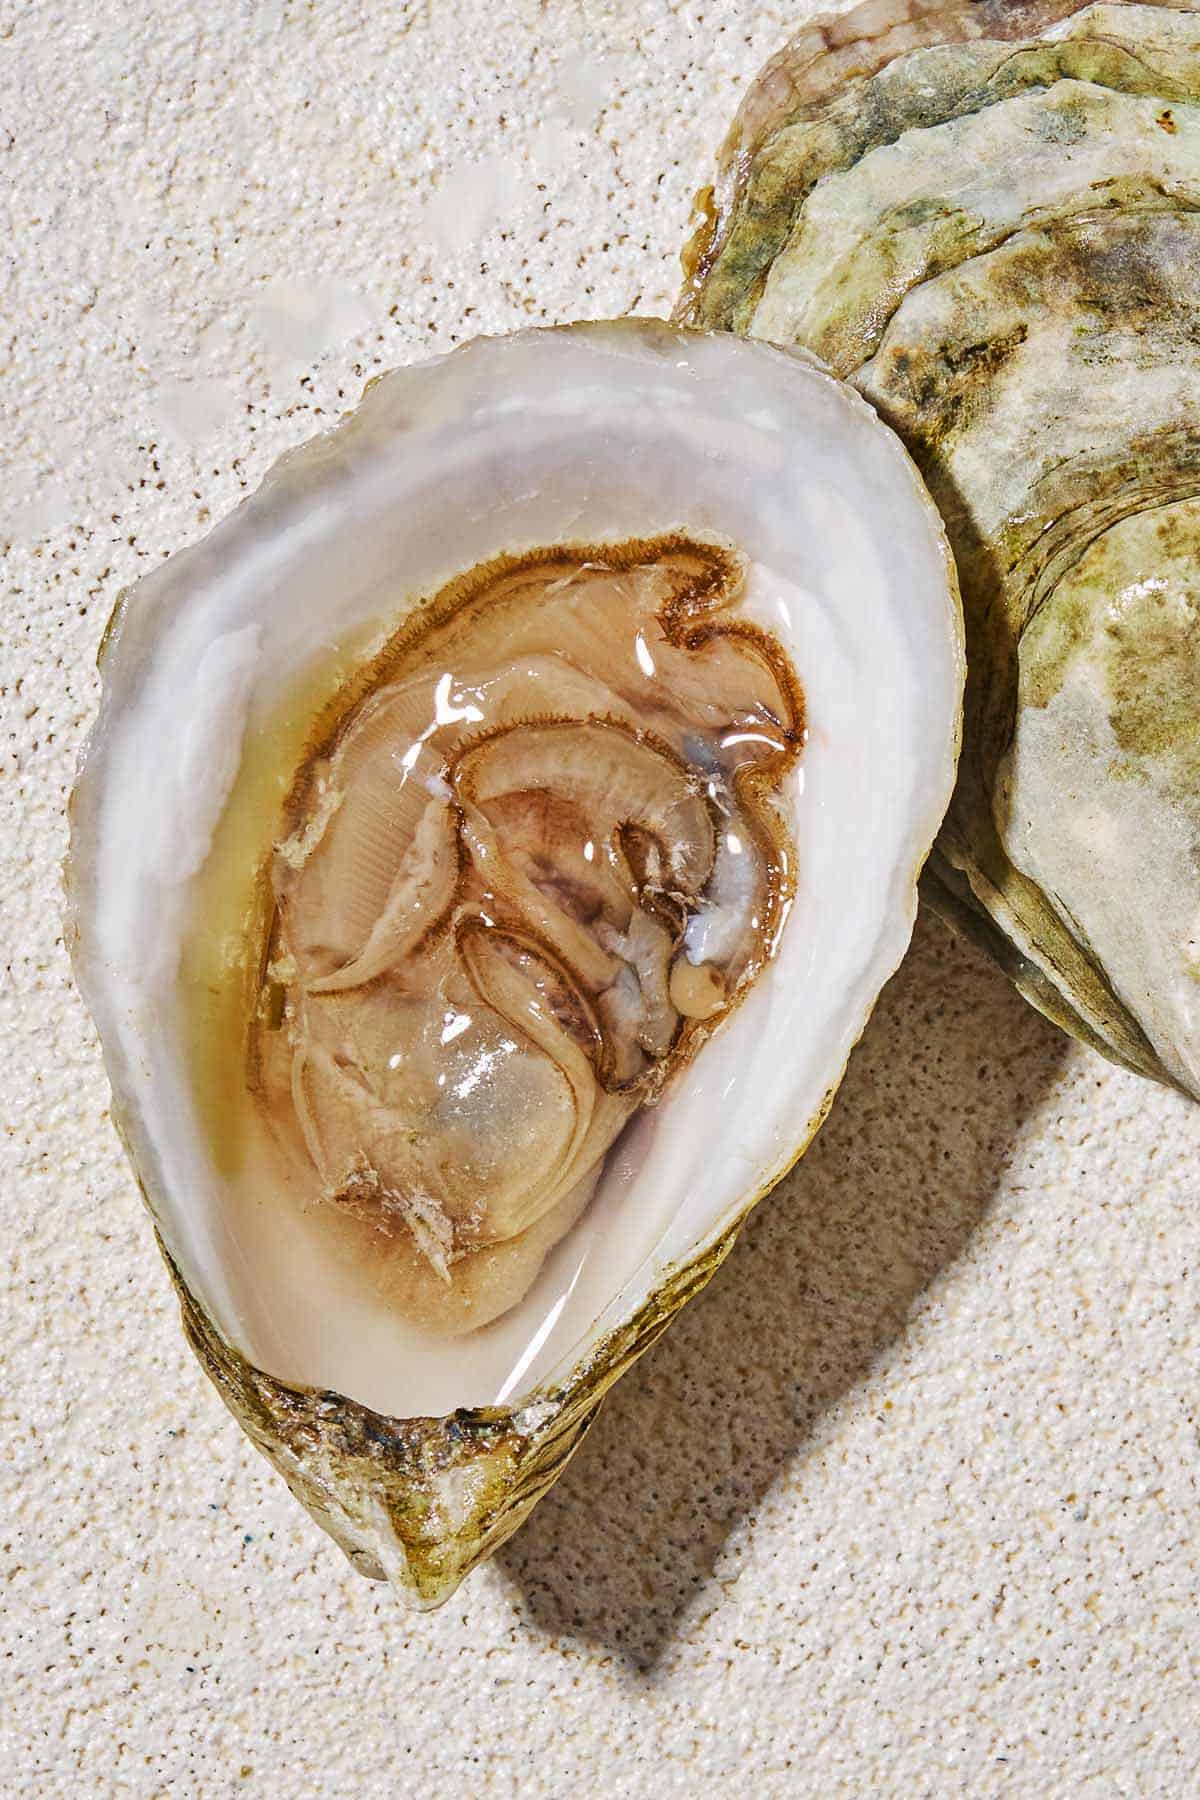
How to Clean Oysters
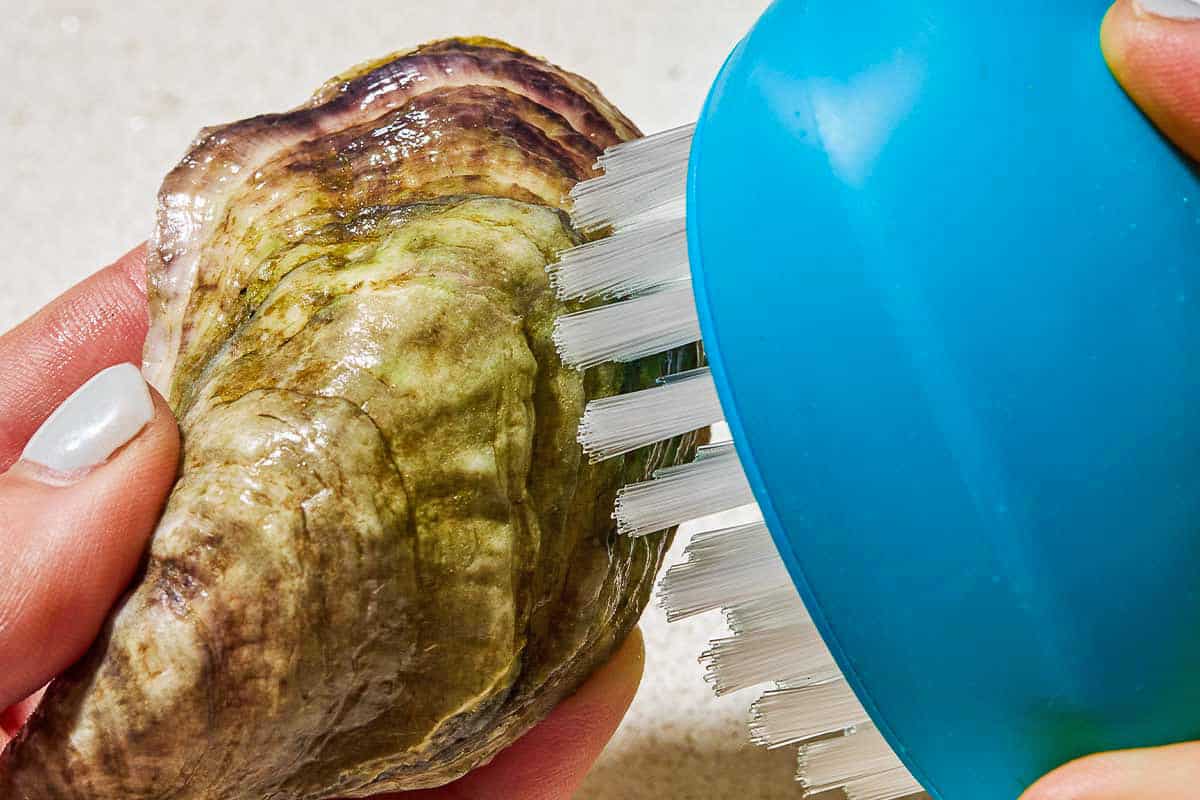
Oysters are often covered in seaweed, dirt, and grit. Scrubbing them is an important step because you want to prevent grit and bits of shell from finding their way into the raw oyster after it’s opened. Here’s how to clean oysters:
- Rinse: Use cold running water (hot water will start to cook them).
- Use a stiff brush to remove any grit. You can use an oyster brush–more commonly called an all-purpose vegetable brush—or just use the same brush you use for dishes. Just be sure to thoroughly rinse off any soap.
How to Shuck Oysters
Shucking an oyster is a skill that takes time to develop. Don’t be discouraged if you have to work at it for a while—you’re not on the clock!
Pick Your Battle Position
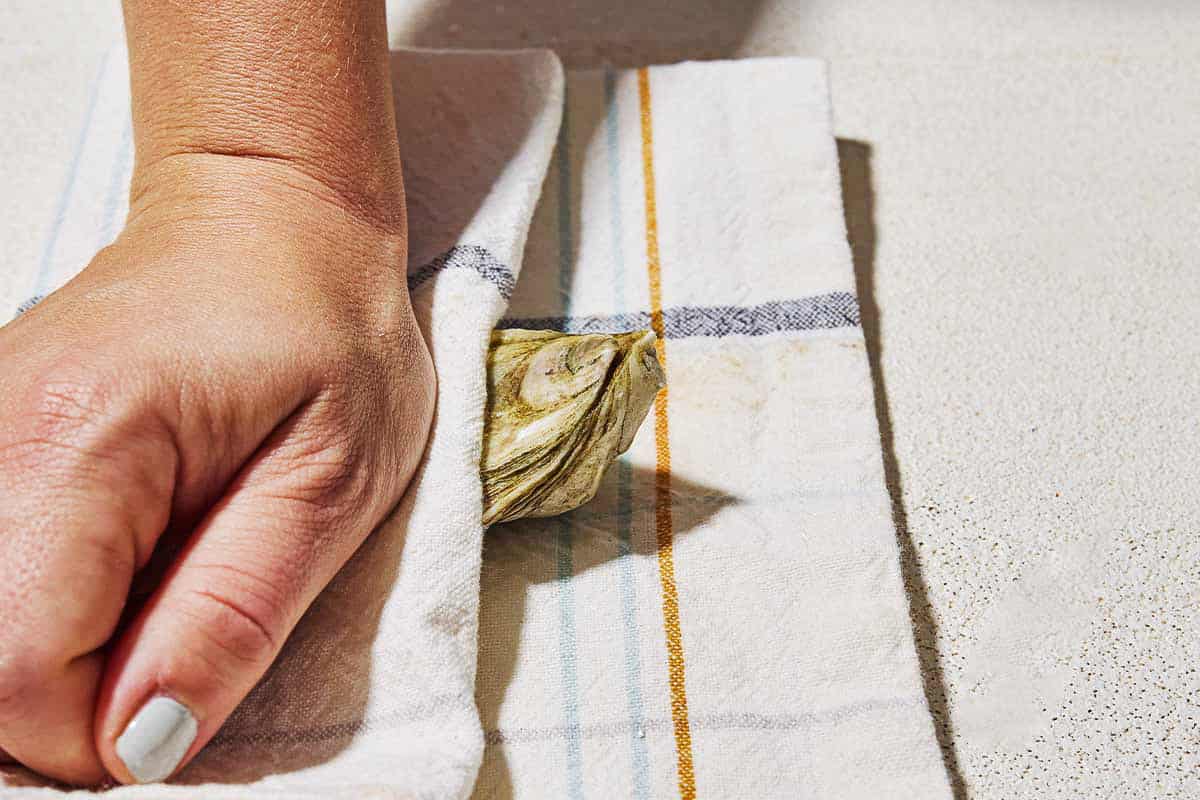
The oyster has a flat upper shell and a bowl, which is larger and convex. You want to keep the bowl at the bottom so the juices and meat stay intact. There are different schools of thought about the easiest, safest, or “best” way to open oysters.
- Countertop method: Sandwich the oyster in a thick kitchen towel, with the flat side on top. Set the oyster on a sturdy surface with the hinge–or part where the oyster comes together at a point–facing toward your dominant hand. Place your non-dominant hand on top of the towel to hold the oyster steady.
- Hand-to-hand: Though some people will tell you it’s more dangerous, I prefer this method because it gives me more control. Place a large, folded kitchen towel in your non-dominant hand, making sure your fingers aren’t exposed. Place the oyster in the center of the towel with the flat shell on top and the hinge–or part where the oyster comes together at a point–pointed toward you. Grasp the sides of the oyster tightly in the towel. Brace your elbow against your torso, holding the oyster away from your body.
Open the Oyster
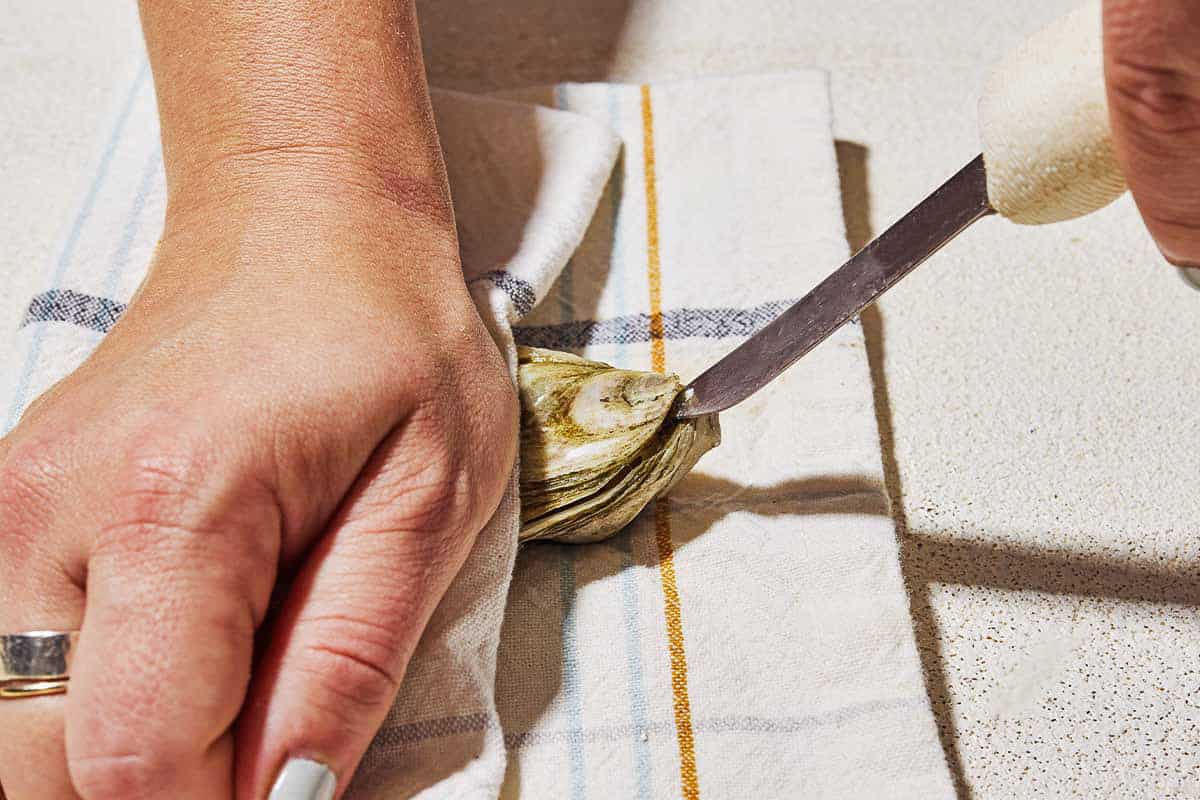
- Find the hinge: Insert the oyster knife with the pointed tip facing upwards into the hinge at a 45-degree angle. Wiggle the knife from side to side, pressing down hard, until the knife finds its way underneath the top shell. This requires a certain amount of brute force, and in some cases, part of the shell will crumble or chip. Don’t give up; wipe away the shell and keep working the tip of the knife into the hinge until you gain leverage.
Finish and Serve
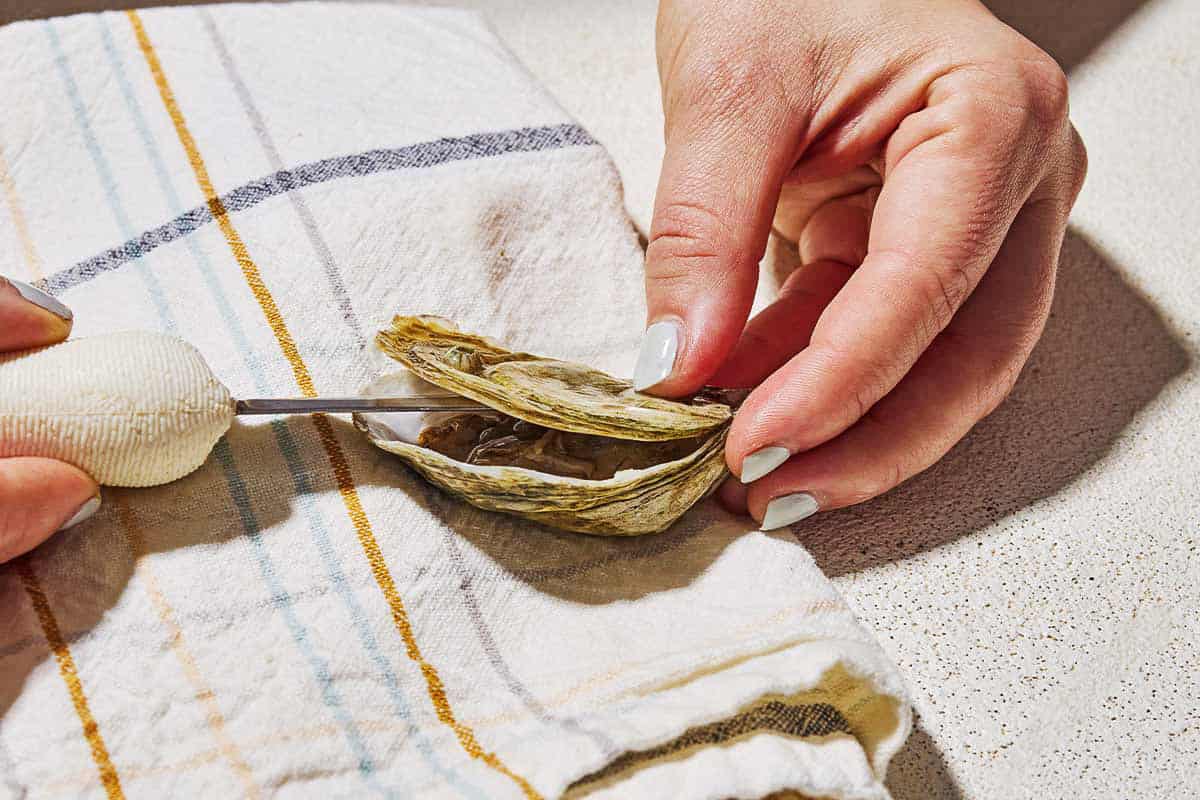
- Pop the Shell: Once the knife is in, turn the knife clockwise with a quick motion of your wrist to pop the shell open. You may even hear a satisfying “pop!”
- Cut off the muscle: Flip the knife over so the tip faces down. Slide the knife gently along the top shell to slice the oyster’s abductor muscle away. Lift the top shell and discard.
- Immediately clean your oyster knife: Wipe any bits of shell off the knife onto your towel.
- Separate the oyster completely: Slide the knife underneath the oyster in the cup side to make sure it is completely loose from the shell, being careful to hold it steady. You want to retain as much of the flavorful liquid from the oyster shell as possible! Serve immediately.
How to Serve Oysters
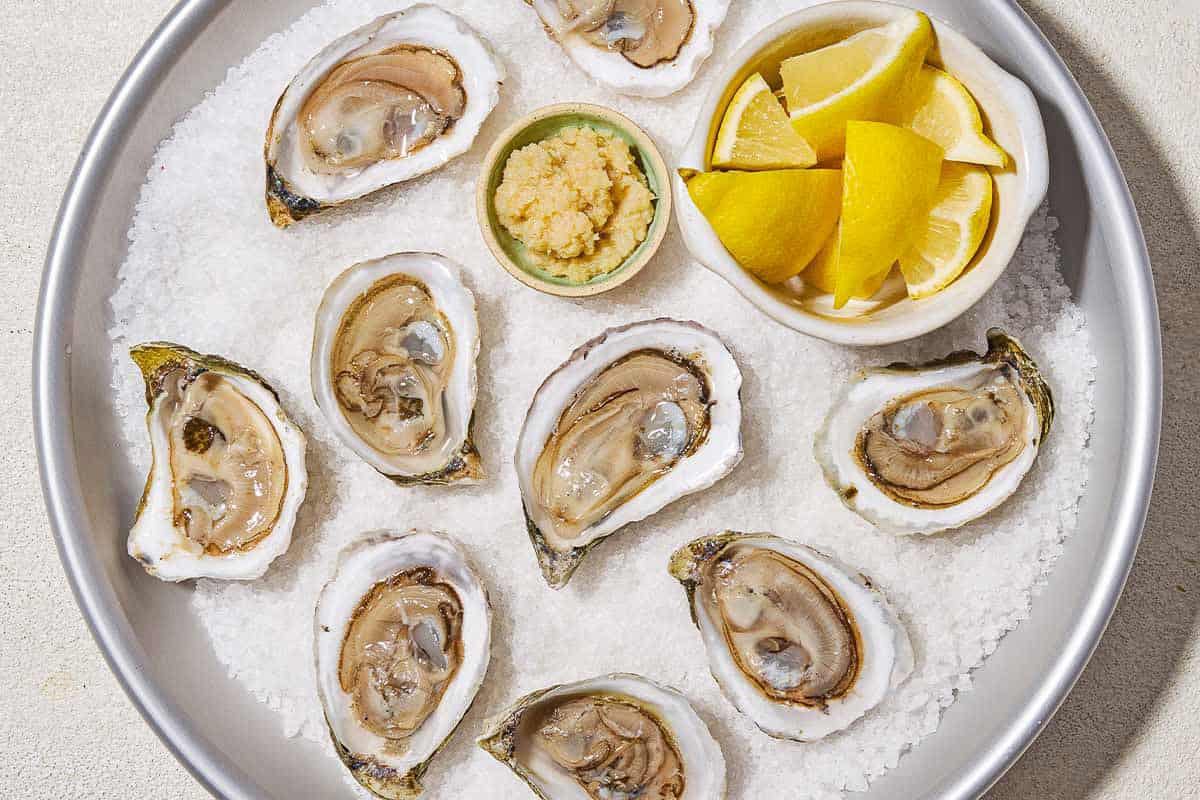
- Balance the oysters: Pour 2-3 cups of rock salt onto a chilled platter. An oyster plate or on standard ice also works, it can just be trickier to balance.
- Make a well: If you’re not using a special oyster platter, dig a space for any sauces. Don’t forget a small spoon.
- Finish and serve: Scatter lemon wedges around the edge of the plate. Nestle the shucked oysters in the salt/ice/plate, being careful not to spill the flavorful juices. Serve immediately, with a container nearby for the leftover shells.
Ways to Prepare Oysters
I generally eat the oyster raw as soon as I shuck it, with mignonette sauce or and/or lemon wedges. However, hot sauce, horseradish, and cocktail sauce are also common when eating raw oysters. And it’s hard to beat raw oysters and a cold glass of Champagne or sparkling wine!
Eating oysters raw and dressed with a sauce or squeeze of lemon is always an easy and classic way to enjoy these seasonal delicacies. But if eating raw oysters isn’t your cup of tea you can also grill, broil, or bake oysters. One of our favorite oyster recipes is to dress shucked oysters with lemon juice, parsley, chili flakes, and breadcrumbs. Bake until the breadcrumbs are crispy and enjoy!
More Seafood Recipes to Love
Browse all Mediterranean recipes.
Visit Our Shop.
Build Your Mediterranean Pantry!
Save when you bundle four of our signature olive oils, perfect for everyday use.


